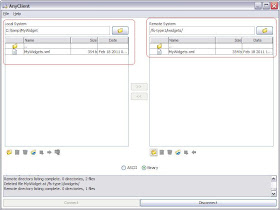
But you have one other option which is to upload the widget.xml file to WebDave store of your portal server and then use the WebDav URL for registering widget. I wanted to try that option so i started by creating a simple MyWidgets.xml file like this
<?xml version="1.0" encoding="UTF-8" ?>
<iw:iwidget id="MyWidgets"
xmlns:xsi="http://www.w3.org/2001/XMLSchema-instance"
xmlns:iw="http://www.ibm.com/xmlns/prod/iWidget"
supportedModes="view" mode="view" lang="en">
  <iw:content mode="view">
      <![CDATA[
      <div>Hello World - Published in WebDav Store</div>
      ]]>
</iw:content>
</iw:iwidget>
The
MyWidget is very simple, it supports only VIEW mode and in VIEW mode it displays Hello World - Published in WebDav Store as markup to the user.I did create this file in
c:\temp\MyWidget folder. After that i used the AnyClient to create WebDav connection to http://localhost:!0039/wps/mycontenthandler/dav/fs-type1 URL like this
Then i used the client to copy the MyWidgets.xml to
fs-types/iwidget folder like this
After copying the MyWidget.xml file to the WebDav repository i used the following configuration task to create a wrapper portlet for the widget
ConfigEngine.bat register-iwidget-
definition -DIWidgetDefinition=dav:fs-type1/iwidgets/MyWidgets.xml -DPorteltUniq
ueName=webspherenotes.MyWidget
Once the task is executed i can add the portlet to page and view it like this

Thanks for info
ReplyDeleteWeb Design Company in Bangalore
Website development in Bangalore