- First connect to
http://localhost:10039/wps/mycontenthandler/dav/skinlistWebDAV URL and you will see list of all the existing skins. - Since i want this theme to be very minimal i started with
ibm.portal.7002NoSkin, so i copied that folder to my local machine like this
- Rename the
ibm.portal.7002NoSkinfolder towebspherenotes.firstmodularskin - Open the
webspherenotes.firstmodularskin\metadata\localized_en.propertiesfile to rename the theme like this# #Thu May 10 10:41:16 PDT 2012 description=My first modular skin title=First Modular Skin - Change the content of the theme_en.html to look like this
Basically i did take out most of the code from the skin except the code required for the portlet title and body and i am adding<span class="wpthemeAccess"> <h4><a rel="dynamic-content" href="lm:title"></a></h4> </span> <div class="wpthemeOverflowAuto"> <!-- lm:control dynamic spot injects markup of layout control --> <a rel="dynamic-content" href="lm:control"></a> </div>First Modular Skin -to the portlet title - Then copy the
webspherenotes.firstmodularskinfolder back to thehttp://localhost:10039/wps/mycontenthandler/dav/skinlistlike this
- Now when you login into Portal admin console you should see the Custom Skin in the list of skins so assign it to either Portal 7002 Theme or some other theme of your choice, i am adding it to Portal 7002 theme like this

Showing posts with label modulartheme. Show all posts
Showing posts with label modulartheme. Show all posts
Creating custom skin for modular theme
In the Create custom Modular Theme i talked about how to create a custom theme based on modular theme architecture, Now i wanted to create a Custom Skin to go along with that theme so i followed these steps.


Deferred module loading in the default Modular theme in WPS 7002
I am playing around with the Modular Theme in WPS 7002 for last few days and one thing that i noticed is the new theme is quite past compared to the older theme. So i was trying to figure out what is going on and it seems IBM used one simple trick(In addition to lot of more complex stuff like combining of resources,.. etc) to speed up the page.
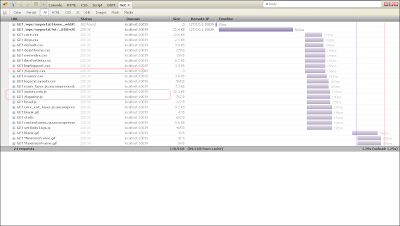
If you load a portal page in the browser and use firebug to look at the requests you will notice that it is loading 24 files. Please note that i am using Disabling combining of resource for debugging modular theme settings so every file gets loaded separately so that i can debug and figure out what is going on. If you have not disabled combining of resources you will see very few requests but little less amount of data will be downloaded from the server
 Now if you click on the edit button you will notice that it takes few seconds to load the customization palette and if you look at the firebug you will notice that it downloads 124 resources and close to 1.7MB of data and when you move to options like Change Layout or Change Style you will see few more requests and some more data being downloaded.
 The Default theme defers loading of edit page related modules which makes sense because the normal user will view page more frequently compared to editing it, some sites wont even allow to edit the page, so why load stuff that is not required and slow down every page.
If you load a portal page in the browser and use firebug to look at the requests you will notice that it is loading 24 files. Please note that i am using Disabling combining of resource for debugging modular theme settings so every file gets loaded separately so that i can debug and figure out what is going on. If you have not disabled combining of resources you will see very few requests but little less amount of data will be downloaded from the server


Creating a Custom Page Layout in WPS 7002
I followed these steps to add a custom page layout in the WPS 7002.
- Create a folder named
CustomLayoutunder/fs-type1/themes/webspherenotes.firstmodular/layout-templates/folder - Copy the layout.html and icon.gif from say 1Column folder and copy it to
CustomLayoutfolder after the copy it should look like this
- Copy the newly created CustomLayout folder to the
/fs-type1/themes/webspherenotes.firstmodular/layout-templates/in WebDav storage like this
- Change the markup of layout.html in the
CustomLayoutfolder to look like this<!-- Entering CustomLayout.layout.html --> <div class="component-container wpthemeCol wpthemeCol-1 ibmDndColumn wpthemeLeft" name="ibmMainContainer"></div> <!-- Entering CustomLayout.layout.html -->I made changes to take out the section that displays hidden widgets on the page and i also did add the HTML comments to show beginning and end of the layout -
Then open the
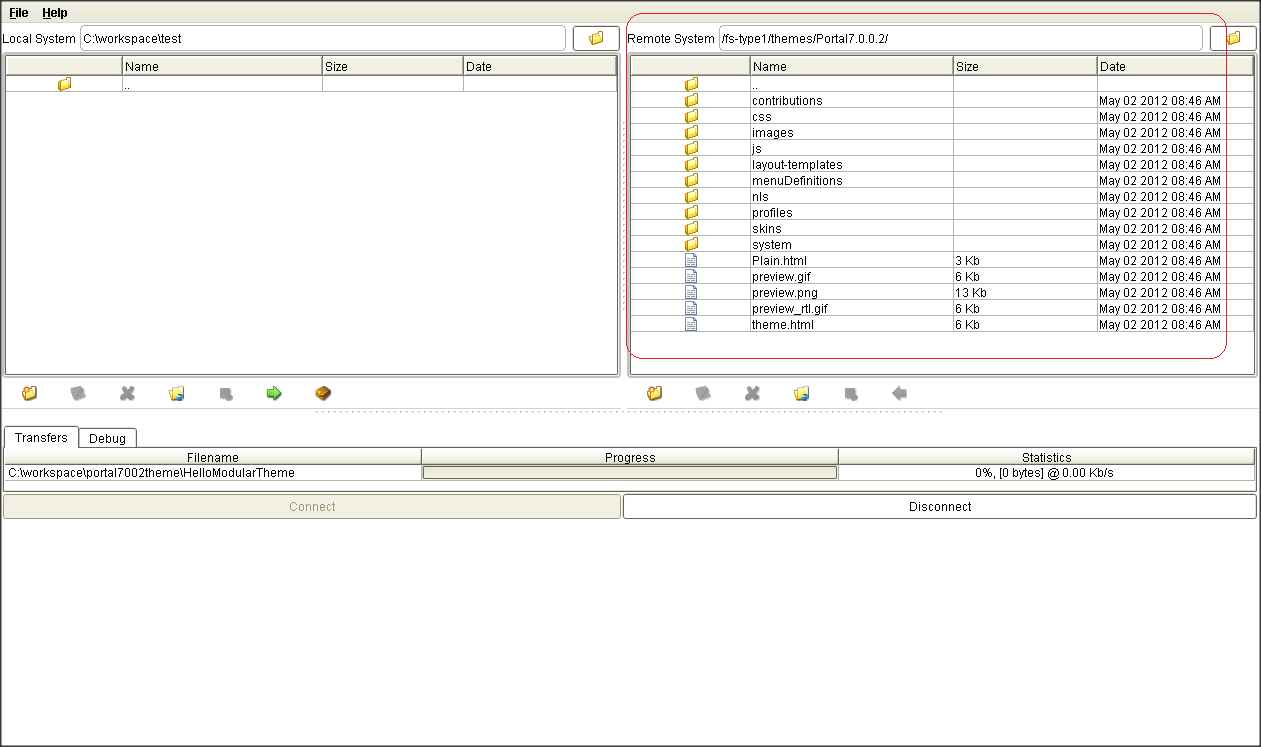
/fs-type1/themes/Portal7.0.0.2/system/layouts.jsonwhich holds list of layouts that appear in the change layout panel. change it to add one row for newly create CustomLayout like this{ 'label':'change_layout_CustomLayout', 'url':ibmCfg.themeConfig.themeWebDAVBaseURI+'layout-templates/CustomLayout/', 'id':'CustomLayout', 'thumbnail':ibmCfg.themeConfig.themeRootURI+'/layout-templates/CustomLayout/icon.gif', 'help':'' } - After make changes copy the layouts.json file to the WebDAV folder
- Now try opening the change layout UI and you might not see the newly added CustomLayout in the option, or you might if you do you will see option to switch to CustomLayout like this. If you dont see CustomLayout option go to next step

- In my case i was not able to see the option for CustomLayout so i looked in the firebug what is going on and it seems that when i go to Change Layout tab browser makes a request to
http://localhost:10039/wps/mycontenthandler/!ut/p/digest!EWsjUKfQQnHqfLpBEXvbog/dav/fs-type1/themes/Portal7.0.0.2/system/layouts.jsonand the browser was using the cached copy for this file and as a result the changes in the layouts.json were not getting reflected. So i did disable the browser caching using firebug like this
- After that when i did refresh the page and i could see the new layouts.json being returned by the server and as a result i could see the change custom layout button


Adding support for JQuery as module in modular theme
I wanted to try adding a custom module in the Modular theme so i started reading the Using jQuery in a theme wiki page and i made few changes in the steps to get it working in my local.
It seems that the source code for all the modules that are part of Portal 7002 modular theme is stored in the .war file in
 Now we are not supposed to add any code in the
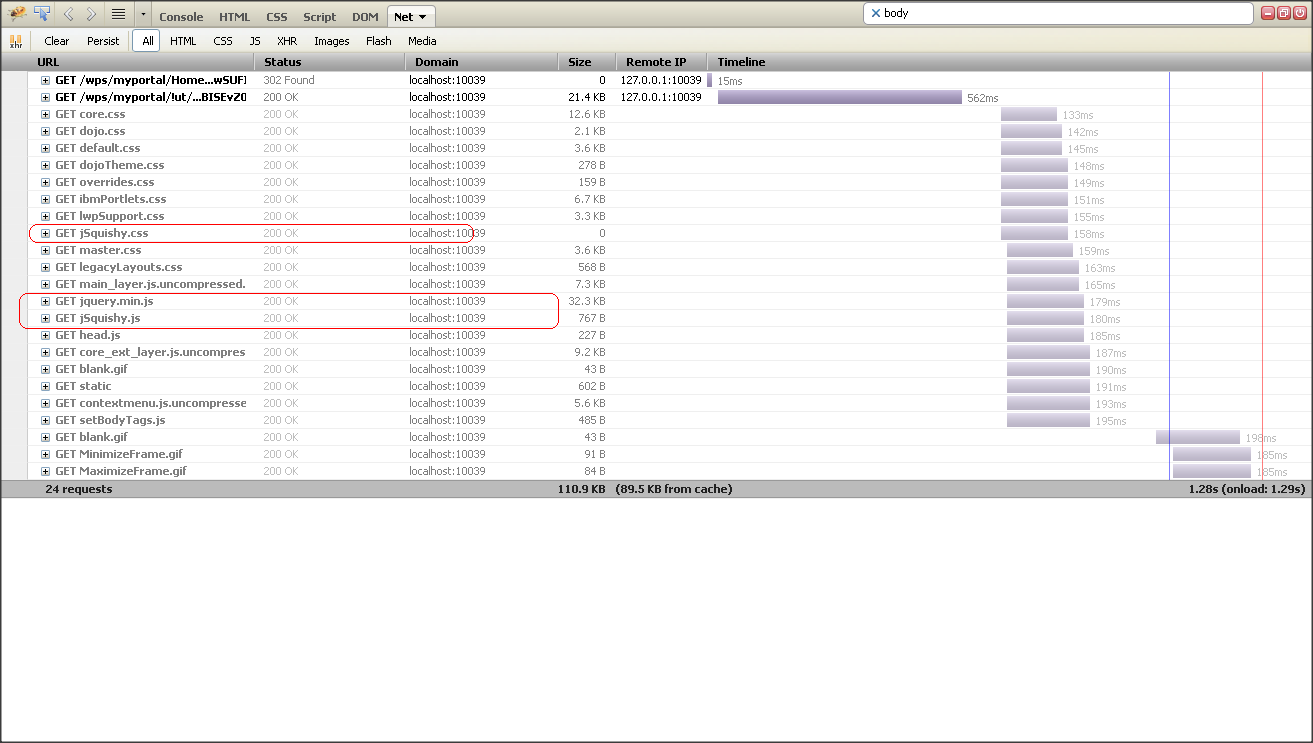
 When i looked at the request flow in the Firebug i can see the jQuery related resources being included. Follow the steps in Disabling combining of resource for debugging modular theme so that you can see individual request for resource.
WebSphere\PortalServer\theme\wp.theme.modules\webapp\installedApps\ThemeModules.ear\ThemeModules.war\modules

WebSphere\PortalServer directory because when you install new fix or fix pack your changes could get overwritten, so i did create a new HelloModular.war file that has all the static resources as well as plugin.xml file that defines the static resources in my theme. You can download the HelloModular.war file with all the source code from here, i followed these steps
- First i did create HelloModular as Dynamic Web Application(basically a .war file) in RAD
- Then i did copy the jquery.min.js(I got the latest version from JQuery Web Site), jSquishy.css,jSquishy.js,jSquishy.jsp(I got the jSquishy related files from Portal Wiki) in the WebContent folder so that they will be available at the root of the HelloModular web application. This is how my project structure looks like

- After that i had to create plugin.xml that defines the jQuery and jSquishy related modules like this
The jquery.min.js is available at<?xml version="1.0" encoding="UTF-8"?> <?eclipse version="3.0"?> <plugin id="com.ibm.portal.jQuery.samples" name="jQuery module contributions" version="1.0.0" provider-name="IBM"> <!-- jQuery js --> <extension point="com.ibm.portal.resourceaggregator.module" id="jQuery_main_head"> <module id="jQuery"> <prereq id="wp_portal"/> <contribution type="head"> <sub-contribution type="js"> <uri value="res:/HelloModular/jquery.min.js" /> </sub-contribution> </contribution> </module> </extension> <extension point="com.ibm.portal.resourceaggregator.module" id="jSquishy_main_head"> <module id="jSquishy"> <prereq id="jQuery"/> <contribution type="head"> <sub-contribution type="css"> <uri value="res:/HelloModular/jSquishy.css" /> </sub-contribution> <sub-contribution type="js"> <uri value="res:/HelloModular/jSquishy.js" /> </sub-contribution> </contribution> <contribution type="config"> <sub-contribution type="markup"> <uri value="res:/HelloModular/jSquishy.jsp"/> </sub-contribution> </contribution> </module> </extension> </plugin>http://localhost:10039/HelloModular/jquery.min.jsso i had to define it likeres:/HelloModular/jquery.min.jswhile declaring it as a module. - The last step was to create a profile_jquery.json like this
After creating this profile_jquery.json i did upload it to{ "moduleIDs" : [ "wp_portal", "wp_theme_portal_7002", "wp_portlet_css", "wp_legacy_layouts", "wp_layout_windowstates", "wp_client_main", "wp_client_ext", "wp_theme_menus", "wp_one_ui_21", "jQuery", "jSquishy" ] }/fs-type1/themes/Portal7.0.0.2/profiles/folder in WebDAV - Last step was to restart the changes for new module definition to get applied
- I did change the profile applied to one of my test page to profile_jquery.json by following steps defined in Changing the profile for a page


Disabling combining of resource for debugging modular theme
If you look at the Net panel for all the resource requests generated by portal page in order to display a page you will notice that it generates very few requests. For example portal will figure out all the JavaScripts files required by the page combine them and return them in single request. Same thing for CSS files it will combine all of them and return a single response in compressed version like this
 But when your debugging the theme you would want to disable this combining of requests to see what all files are getting loaded on a page as well as get uncompressed version of the files in order to do that you can set following trace string
 After setting the trace string when you refresh the same portal page you will see separate requests for resources on the page also you will notice portal is returning uncompressed version like this


com.ibm.wps.resourceaggregator.CombinerDataSource.RemoteDebug=all


Changing the profile for a page
The default profile for the Portal7002 theme is
 Once you set that and access the page you will see that it does not have page action button any more.

profiles/profile_deferred.json but you can override it at page level by setting the value of resourceaggregation.profile to different profile for example i can set it to profiles/profile_lightweight.json like this
Create custom Modular Theme
I am learning about the new Modular theme that ships as part of the WPS 7002 and i wanted to create a new modular theme so that i could play around with it. So these are the steps that i followed
- First i did connect to
http://localhost:10039/wps/mycontenthandler/dav/themelistURL using the WebDAV client and there i could seecsa2.themefolder for PageBuilder2 based theme andibm.portal.7002Themefolder for the Modular theme, so i did download theibm.portal.7002Themefolder on my local machine
- Then i did change name of that folder to
webspherenotes.firstmodular - Then i opened the metadata/localized_en.properties file and i did change the title of the theme like this
description=
title=FirstModular
I also made changes in the metadata.properties file to change the value of - After that i did upload the
webspherenotes.firstmodulartheme back to the WebDAV store like this
- Now when i logged into WebSphere Portal Admin console and went to Theme and Skin management i could see FirstModular theme in the list like this

- The last step was to assign the Portal 7.0.0.2 based skins to the FirstModular theme and then assign that theme to the page. When i tried accessing a FirstModular based page without assigning the Portal 7.0.0.2 based skin it looked like this
But assigning correct skin solved the problem

com.ibm.portal.layout.template.href to point to a 2ColumnEqual layout that is inside the firstmodular theme like this. I also change the value of com.ibm.portal.layout.template.href
com.ibm.portal.layout.template.href=dav\:fs-type1/themes/firstmodular/layout-templates/2ColumnEqual/
com.ibm.portal.themetype=CSA2
resourceaggregation.profile=profiles/profile_full.json


Where is the code for modular theme
I started looking into how the WebSphere 7002 Modular theme looks like and first step was to figure out where is the source code for the theme. So it seems that the Modular theme is basically a Page Builder theme.
The page builder theme code is normally divided into 2 parts one is static resource such as static html markup files, JavaScript and CSS files that code is stored in the WebDAV at
 If you dig dipper into the static resources you will notice that it has the same theme.html file as the entry point for the static markup and same layout and skin related folders
 The difference in the theme.html file is couple of additional lines that are responsible for adding necessary JavaScript and CSS files. For example in the

http://localhost:10039/wps/mycontenthandler/dav/fs-type1/themes folder


<head> you will see this line
<link rel="dynamic-content" href="co:head">
this line is responsible for including necessary CSS that is required for the page and it also contains bare essential JavaScript.
The following line is added at the end just above the closing <body> element, it is responsible for including necessary JavaScript in the page.
<a rel="dynamic-content" href="co:config"></a>
The basic idea is to include all the CSS at the top so that when the browser starts rendering markup it has all the classes and include all the JavaScript at the bottom so that the page starts rendering soon without waiting for downloading all the JavaScript
The dynamic part of the resources are included using .jsp pages which are bundled in ThemeModules.ear which is available at WebSphere\PortalServer\theme\wp.theme.modules\webapp\installedApps

Installing new WPS 7.0.0.2 Modular theme
The WebSphere Portal 7.0.0.2 fixpack introduced a concept of Modular Theme which allows you to create themes using different module extensions to contribute to different areas of the page in order to provide flexibility, enhance the user experience, and maximize performance.
I wanted to learn more about the Modular Theme so i followed these steps to install WPS 7.0.0.2 and install Modular theme, on my existing WPS 7.0 installation.

- When you install WPS on your machine by default it install WebSphere Application Server 7.0.11 which is not sufficient to install WPS 7.0.0.2, so first you must update your WAS, i did update mine by going to the latest version which is 7.0.21. My development environment is standalone so i had to install
- 64-bit x86 AMD/Intel AppServer: WAS fix pack
- 64-bit x86 AMD/Intel Java SDK: Fix pack for the JDK used by WAS
- Then i did install WebSphere Portal 7.0.0.2 Fix pack
- The Modular theme is not installed as part of WPS 7.0.0.2 fix pack installation process instead you will have to run following configuration task
This task took few minutes to complete. But once the task was completed i could see Portal 7.0.0.2 name in the theme list like thisConfigEngine.bat deploy-7002-theme -DPortalAdminPwd=password -DWasPassword=password


Subscribe to:
Posts (Atom)