Assiginging administrative roles to user

In most of the organizations only WAS Admin or Infrastructure team has access to WAS Admin Console, but sometimes members of your development team might want limited access to the WAS Admin console so that they can view the current configuration or you might want to allow them to stop and start server (I think its OK to allow development team to view current configuration in Development environment, but the security team might not allow them access to WAS Admin console in the QA or Production environment )

I wanted to check if i can allow development team to access the admin console so that they can view the configuration but not change it. In order to do that i had to first create a devteam group, add couple of users to that group and then assign Monitor role to the devtream group. In my case i am using default WAS installation so i am using Federated repository to store user configuration. I followed these steps


  • Login into the WAS Admin Console and go to Users and Group -< Manage Groups


  • Click on Create button to start creation of new group


  • Then go to Users and Group -< Manage User to look at the list of users


  • Click on create button and start creation of new user, Sunil


  • Go back to Manage Groups select the devteam group and add Sunil and Jiya as member to the devtream group


  • Now our devteam group is ready with the members and next step is to assign Monitor role to the devteam. For that first go to Security -< Global Security and click on Administer Group Roles


  • You should see list of existing group roles like this


  • Click on create and on the next screen click assign Monitor role to the devteam


  • You should be able to see the role assignment for the devteam group


  • Save your changes and restart the server, now you should be able to login into WAS Admin Console using one of the members in the devteam and you will notice that the configuration is read only


How to stop WAS + WPS without passing userId and password to stopserver

If admin security is enabled on the WAS server you will have to specify the user name and password when you want to stop the WAS server, You can run the following command to do that

./stopServer.sh server1 -username wasadmin -password wasadmin


For WebSphere Application Server running under a UNIX-based operating system (OS), the previously mentioned command (the UNIX equivalent) carries a serious security problem. Anybody who uses the command ps -ef while the stopServer process is running is able to see the user ID and the password.

In order to solve this problem you can follow these steps

  1. First open the /WebSphere/AppServer/profiles/AppSrv01/properties/soap.client.props file in the text editor and change value of following three properties

    com.ibm.SOAP.securityEnabled=true
    com.ibm.SOAP.loginUserid=wasadmin
    com.ibm.SOAP.loginPassword=wasadmin

    The value of com.ibm.SOAP.loginUserid should be equal to the name of the wasadmin user and the value of com.ibm.SOAP.loginPassword would be equal to password for the wasadmin


  2. Since your storing the password in plain text in the .properties file someone can read it to deal with that issue you should use the PropFilePasswordEncoder.sh command with the fully qualified file name and the name of the property that holds the password

    ./PropFilePasswordEncoder.sh /opt/IBM/WebSphere/AppServer/profiles/AppSrv01/properties/soap.client.props com.ibm.SOAP.loginPassword

    After running this command if you open the soap.client.props file in the text editor you will notice that value of the password is encoded

    com.ibm.SOAP.securityEnabled=true

    #------------------------------------------------------------------------------
    # - authenticationTarget ( BasicAuth[default], KRB5. These are the only supported selection
    # on a pure client for JMX SOAP Connector Client. )
    #------------------------------------------------------------------------------
    com.ibm.SOAP.authenticationTarget=BasicAuth

    com.ibm.SOAP.loginUserid=wasadmin

    com.ibm.SOAP.loginPassword={xor}KD4sPjsyNjE=


  3. Restart the server and after that you wont have to use the password on the command line to stop the server

Property based configuration in WAS7

The WebSphere Application Server V7.0 has concept of properties file based configuration. The basic idea is that you can extract configuration of existing object into .properties file, modify that properties file, validate and import it back in the WAS server to change the object.

I wanted to try this feature so i first i created a 
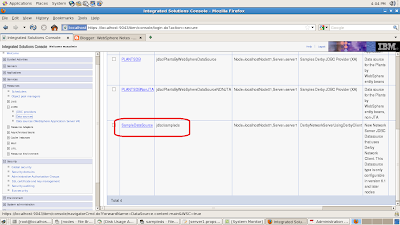
SampleDataSource on my machine, the SampleDataSource is bound to jdbc/sampleds, name in the JNDI namespace


Then i opened a wsadmin command prompt to connect to WAS, and i executed this command

AdminTask.extractConfigProperties('-configData DataSource=SampleDataSource -propertiesFileName /tmp/sampleds.properties')


The AdminTask.extractConfigProperties() method lets you retrieve configuration of object into properties file, the value of -configData argument gives name of the object that you want to export, In my case i am saying export DataSource object with name equal to SampleDataSource and export it into /tmp/sampleds.properties.

This is how the sampleds.properties file looks like, as you can see all the configuration is exported in key value pairs.


#
# Configuration properties file for cells/localhostNode01Cell/nodes/localhostNode01/servers/server1|resources.xml#DataSource_1300824072894#
# Extracted on Tue Mar 22 16:07:09 EDT 2011
#

#
# Section 1.0 ## Cell=!{cellName}:Node=!{nodeName}:Server=!{serverName}:JDBCProvider=ID#JDBCProvider_1300823613457:DataSource=ID#DataSource_1300824072894
#

#
# SubSection 1.0.0 # DataSource attributes
#
ResourceType=DataSource
ImplementingResourceType=GenericType
ResourceId=Cell=!{cellName}:Node=!{nodeName}:Server=!{serverName}:JDBCProvider=ID#JDBCProvider_1300823613457:DataSource=ID#DataSource_1300824072894
#

#
#Properties
#
name=SampleDataSource
category=null
datasourceHelperClassname=com.ibm.websphere.rsadapter.DerbyNetworkServerDataStoreHelper
authMechanismPreference=BASIC_PASSWORD #ENUM(BASIC_PASSWORD|KERBEROS)
statementCacheSize=10 #integer
providerType=Derby Network Server Using Derby Client #readonly

jndiName="jdbc/sampledatasource"

relationalResourceAdapter=WebSphere Relational Resource Adapter #ObjectName(J2CResourceAdapter)
xaRecoveryAuthAlias=null
diagnoseConnectionUsage=false #boolean
authDataAlias=
manageCachedHandles=false #boolean
provider=DerbyNetworkServerUsingDerbyClient #ObjectName(JDBCProvider),readonly
description=New Network Server JDBC Datasource that uses Derby Network Client. This Datasource type is only configurable in version 6.1 and later nodes
logMissingTransactionContext=true #boolean


#
# SubSection 1.0.0.0 # ConnectionPool attributes
#
ResourceType=ConnectionPool
ImplementingResourceType=GenericType
ResourceId=Cell=!{cellName}:Node=!{nodeName}:Server=!{serverName}:JDBCProvider=ID#JDBCProvider_1300823613457:DataSource=ID#DataSource_1300824072894:ConnectionPool=ID#ConnectionPool_1300824072899
AttributeInfo=connectionPool
#

#
#Properties
#
stuckThreshold=0 #integer
unusedTimeout=1800 #long
maxConnections=10 #integer
stuckTimerTime=0 #integer
testConnectionInterval=0 #integer
minConnections=1 #integer
surgeThreshold=-1 #integer
connectionTimeout=180 #long
purgePolicy=EntirePool #ENUM(EntirePool|FailingConnectionOnly)
surgeCreationInterval=0 #integer
numberOfUnsharedPoolPartitions=0 #integer
stuckTime=0 #integer
agedTimeout=0 #long
reapTime=180 #long
testConnection=false #boolean
numberOfSharedPoolPartitions=0 #integer
freePoolDistributionTableSize=0 #integer
numberOfFreePoolPartitions=0 #integer


#
# SubSection 1.0.0.1 # ConnectionTest attributes
#
ResourceType=ConnectionTest
ImplementingResourceType=GenericType
ResourceId=Cell=!{cellName}:Node=!{nodeName}:Server=!{serverName}:JDBCProvider=ID#JDBCProvider_1300823613457:DataSource=ID#DataSource_1300824072894
AttributeInfo=preTestConfig
#

#
#Properties
#
preTestConnection=null #boolean
retryLimit=null #integer
retryInterval=null #integer


#
# SubSection 1.0.0.2 # DataSource J2EE Properties
#
ResourceType=J2EEResourcePropertySet
ImplementingResourceType=GenericType
ResourceId=Cell=!{cellName}:Node=!{nodeName}:Server=!{serverName}:JDBCProvider=ID#JDBCProvider_1300823613457:DataSource=ID#DataSource_1300824072894:J2EEResourcePropertySet=ID#J2EEResourcePropertySet_1300824072898
AttributeInfo=resourceProperties(name,value)
#

#
#Properties
#
dataSourceName= #String
webSphereDefaultIsolationLevel= #integer
nonTransactionalDataSource=false #boolean
freeResourcesOnClose=false #boolean
portNumber=1527 #integer
reauthentication=false #boolean
connectionAttributes= #String
preTestSQLString=SELECT CURRENT SQLID FROM SYSIBM.SYSDUMMY1 #String
serverName=localhost #String
validateNewConnection=false #boolean
validateNewConnectionRetryCount=100 #integer
traceFile= #String
connectionSharing=1 #integer
beginTranForResultSetScrollingAPIs=false #boolean
enableMultithreadedAccessDetection=false #boolean
retrieveMessageText=true #boolean
description= #String
userDefinedErrorMap= #String
errorDetectionModel=ExceptionMapping #String
jmsOnePhaseOptimization=false #boolean
beginTranForVendorAPIs=false #boolean
databaseName=/temp/sampleds;create=true #String,required
validateNewConnectionRetryInterval=3 #long
traceLevel= #integer


#
# SubSection 1.0.0.3 # DataSource Custom Properties
#
ResourceType=DataSource
ImplementingResourceType=GenericType
ResourceId=Cell=!{cellName}:Node=!{nodeName}:Server=!{serverName}:JDBCProvider=ID#JDBCProvider_1300823613457:DataSource=ID#DataSource_1300824072894
AttributeInfo=properties(name,value)
#

#
#Properties
#


#
# End of Section 1.0# Cell=!{cellName}:Node=!{nodeName}:Server=!{serverName}:JDBCProvider=ID#JDBCProvider_1300823613457:DataSource=ID#DataSource_1300824072894
#
#
#
EnvironmentVariablesSection
#
#
#Environment Variables
cellName=localhostNode01Cell
serverName=server1
nodeName=localhostNode01


I changed value of jndiName property to jdbc/sampledatasource and saved the file, then i used following command to validate the sampleds.properties file


AdminTask.validateConfigProperties('-propertiesFileName /tmp/sampleds.properties')


If the configuration is valid it returns true, if the configuration is valid you can executed AdminTask.applyConfigProperties() command to apply the configuration defined in the sampleds.properties file to the server


AdminTask.applyConfigProperties('-propertiesFileName /tmp/sampleds.properties -validate true')
AdminConfig.save()


Dont forget to call AdminConfig.save() to actually commit your changes, if you dont call it then your changes will be lost

Creating new PageBuilder2 Skin

The Creating a new PageBuilder 2 theme post has information about how to create a new PageBuilder 2 based theme. You can follow following steps to create a new PageBuilder2 Based skin.


  • First use the WebDAV client to create connection to http://localhost:10039/wps/mycontenthandler/dav/skinlist, once you do that you should see list of all the skins available on the server like this


  • Download the csa2.standardfolder on your machine in say C:\Temp\fs-type1\skins


  • Rename the folder to say csa2.websphereNotes.skin

  • Open the localized_en.properties file in Notepad and change value of title like this

    #
    #Mon Mar 21 09:37:59 PDT 2011
    description=
    title=WebSphere Notes Skin


  • Upload the csa2.websphereNotes.skin folder back to http://localhost:10039/wps/mycontenthandler/dav/skinlist URL


  • Now if you log into the WPS Admin Console and go to Themes and Skins portlet you should see your skin, if you dont try restarting or creating a new Test Skin manually from the Admin Console, which should flush your cache


The next step would be to add this skin to your theme and then you can apply it to a page

Adding custom dynamic content spot in your PageBuilder2 theme

In the Creating a new PageBuilder2 Theme entry i mentioned the steps to create a Custom PageBuilder2 Theme, but in that case we only changed the static html file in the theme, but what if you want to add a new dynamic content spot or you want to override functionality in say Default.jsp or some other JSP, follow these steps


  1. Create a new .war file say WPNotesTheme which should be a servlet specification 2.4 compliant web application.

  2. Copy content of WebSphere\PortalServer\theme\wp.mashup.cc.theme\installedApps\wp.mashup.cc.theme.ear\PageBuilder2.war, into your war file. I always make sure to copy the WebContent\themes, WebContent\skins folder and also content inside the WEB-INF such as tld folder and other files


  3. Once your .war file is ready deploy it on the WebSphere Portal server as .war file using either WebSphere Application Server Admin Console or using RAD, If your deploying on RAD, it might fail saying the application has errors(It happens because we are using the portal theme Tags that RAD is not able to find ), To fix this issue go to Windows -> Preferences and check "Allow applications containing errors to be published on server" check box

    In my case i am deploying the WPNotesTheme at WPNotesTheme context root

  4. Once the WPNotesTheme.ear application is installed, next step is to change the theme to use the WPNotesTheme.ear instead of default PageBuilder2. In order to do that first take full export of your portal

  5. Create UpdateTheme.xml file by copying the csa2.websphereNotes related theme element in it. Change value of context-root element and WPNotesTheme element to WPNotesTheme because thats where the theme is installed, your xmlaccess should look something like this

    <?xml version="1.0" encoding="UTF-8"?>
    <request build="wpnext_528_01" type="update" version="7.0.0.0" xmlns:xsi="http://www.w3.org/2001/XMLSchema-instance"
    xsi:noNamespaceSchemaLocation="PortalConfig_7.0.0.xsd">
    <portal action="locate">
    <theme action="update" active="false" context-root="/WPNotesTheme" default="false" domain="rel"
    objectid="ZJ_CCBRVKG10GE2D0IEJ69NID3082" resourceroot="WPNotesTheme">
    <localedata locale="en">
    <title>WebSphere Notes Theme</title>
    <description/>
    </localedata>
    <parameter name="com.ibm.portal.themetype" type="string"
    update="set"><![CDATA[CSA2]]></parameter>
    <parameter name="theme.capability.oneUI" type="string"
    update="set"><![CDATA[2.1]]></parameter>
    <parameter name="theme.capability.dojo" type="string"
    update="set"><![CDATA[1.4.3]]></parameter>
    <parameter name="com.ibm.portal.friendly.name" type="string"
    update="set"><![CDATA[csa2.websphereNotes]]></parameter>
    <parameter name="theme.capability.mashups.enabler" type="string"
    update="set"><![CDATA[2.4]]></parameter>
    <parameter name="com.ibm.portal.theme.template.ref" type="string"
    update="set"><![CDATA[dav:fs-type1/themes/csa2.websphereNotes/]]></parameter>
    </theme>
    </portal>
    </request>


  6. Import the updatetheme.xml in your websphere portal server, and now if you access the theme test page you will notice that Default.jsp from your WPNotesTheme.war is getting executed, when you hit the THeme test page you should see that Default.jsp in your .war file is getting compile

    [3/18/11 19:33:02:501 PDT] 00000055 servlet I com.ibm.ws.webcontainer.servlet.ServletWrapper init SRVE0242I: [WPNotesThemeEAR] [/WPNotesTheme] [/themes/html/Default.jsp]: Initialization successful.

    You can also verify this by adding couple of System.out lines in your Default.jsp


  7. But you will notice that if you make change in any other JSP say bannerNav.jsp then your bannerNav.jsp is not getting executed instead the one in PageBuilder2.war is getting executed that is because your dynamic content spot in theme.html is still pointing to the PageBuilder2.war. YOu can fix this by changing the theme.html like this


    <a rel="dynamic-content" href="res:/WPNotesTheme/themes/html/PageBuilder2/bannerNav.jsp"></a>
    <%--
    <a rel="dynamic-content" href="dyn-cs:id:bannerNav@tl:oid:csa2.theme"></a>
    --%>


    In this case i am commenting out the bannerNav dynamic spot and replacing it with URL to res:/WPNotesTheme/themes/html/PageBuilder2/bannerNav.jsp, if you want you can actually change the value of dynamicContentSpot in the WAS Admin Console but it will require a server restart so may be you can make the changes before going to production

  8. Last step would be copy your modified theme_en.html to the WebDav store


Once your changes are uploaded on the server you can hit your theme test page and you should see your changes

Creating a new PageBuilder 2 theme

If you want to create a new PageBuilder2 Theme and you want to make minimal changes that require changing only static files then you can follow these steps

  1. Use WebDav client to connect to http://localhost:10039/wps/mycontenthandler/dav/themelist, you should see list of themes that are already installed on your portal like this

    YOu can see two themes here because WPS 7 ships with 2 different themes

    • csa2.theme: This is the PageBuilder2 theme which is applied to User pages(Home pages)

    • ibm.portal.theme.Portal: This is the old Portal Theme that is applied to Administration section of the portal


  2. Download the csa2.theme to your local folder say in c:\temp\

  3. Rename the csa2.theme folder to some other folder say csa2.websphereNotes, the csa2.websphereNotes will be used as uniqueName for theme

  4. Open the C:\Temp\csa2.websphereNotes\metadata\localized_en.properties file in the Notepad and change the value of title property to say WebSphere Notes like this

    #
    #Fri Mar 18 16:25:55 PDT 2011
    description= WebSphere Notes PageBuilder2 Theme
    title=WebSphereNotesTheme


  5. Now use the WebDav client to upload the csa2.webSphereNotes folder onto WebDav store at /themelist url


  6. Now if you login into portal and go to Themes and Skins portlet you should see the Theme that we just created

    If you dont see your theme name here then that means the name is cached somewhere you can either restart the server or click on Add New Theme button and create new theme from there to see your theme name.


After installing theme if you try to update the theme say in theme_en.html file you add some text and try uploading the new theme_en.html using /themelist URL then you will notice that the changes dont get reflected, because your supposed to use /fs-type1 URL for modifying static files. After installing csa2.websphereNotes theme i wanted to change the theme_en.html, so i used these steps

  • Connect to the http://localhost:10039/wps/mycontenthandler/dav/fs-type1 url


  • Go to themes folder and you should see csa2.websphereNotes theme here


  • Now go to /fs-type1/themes/csa2.websphereNotes/nls/ folder in WebDav and copy the modified theme_en.html file here


Now if you go to portal page that is using your test theme you should be able to see your changes

Some important URL's for working with WebDav

In the past i blogged about different WebDAV URL's and how i am having difficulty in figuring out which are the right URL's to use and since now i have some visibility in these things i thought i should list out the difference URL's that we are supposed to use

The WebDav URL always begins with http://localhost:10039/wps/mycontenthandler/dav/, my guess is portal makes use of friendly URL mappings to map all the Dav URLs, basic idea is you can create your own URL schema and use the

  1. /themelist: This URL is administration URL that should be used for registering new theme, when you upload theme folder with this URL, two things will happen first the files will get uploaded to WebDAV file store and the theme will be registered in portal data base (Normally we use xmlaccess script to register a theme)

  2. /skinlist: This URL is administration URL that should be used for registering a new Skin in portal database as well as uploading skin related files to WebDAV file store

  3. /contentmodel/wps.content.root: Should be used for accessing the page information and updating the portal page metadata, you can find more information at Using webdav to manage portal pages

  4. /fs-type1: This is generic file store for hosting static files in web dav


The fs-type1 static file store is divided into multiple folders


  • common-resources: Should be used to store the static files such as css, images, JavaScript that will be used by more than one theme

  • iwidgets: folder should be used for storing iWidget.xml file, How to publish iWidget xml in the WebDav store , has more information

  • layout-templates: The layout templates directory is used for storing all the page layout templates, there is one directory for every template. Surprisingly there is no admin URL for registering layout templates, may be because layouts are not stored in portal database(I cant see layout-template element in xmlaccess export)


  • skins: We are supposed to use this folder to update the existing skin related static files

  • themes: We are supposed to use this folder to update the static files in existing theme

  • system:

  • users

  • public: