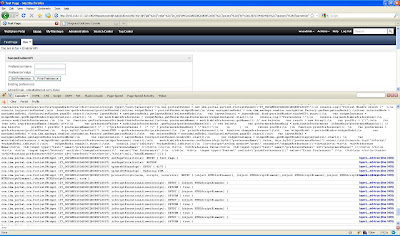
Problem with enable client side logging

I followed the steps in Enable client side logging , to turn the client side logging on, but somehow the logs were not getting enabled, so i made changes in the WebSphere/PortalServer/theme/wp.mashup.cc.theme/installedApps/wp.mashup.cc.theme.ear/PageBuilder2.war/themes/html/PageBuilder2/configGlobal.jsp manually

I made changes to set value of isDebug to true and value of traceConfig to ["com.ibm.mm.iwidget.*"]

"isDebug": "true",
traceConfig: ["com.ibm.mm.iwidget.*"],


Then i could see the client side logging

Enable client side logging

WebSphere Portal 7.0 has lot of JavaScript code for Page Builder theme, for enabler API, for mashups, iWidgets,.. So if something goes wrong we will need a way to debug the problem on the client side. You can enable client side logging by following these steps


  • Login into WAS Admin console for WebSphere Portal server

  • Go to Resources -> Resource environment providers -> WP CommonComponentConfigService > Custom properties and set value of cc.isDebug property to true


  • Next step is to set trace string, which is same as that of the log trace string that we set for server side logging, but here you will have to set the traceConfig on the client side, setting set of packages for which you want to enable trace like this


  • Once the trace related properties are set verify them in the Admin COnsole like this


  • Save your changes and restart the server


Once the server is restarted you can view the log on the client side, if your using Firefox browser you can see the logs in the console view of Firebug like this


But if your using Internet explorer you will have to install Developer Tools and you can see the logs like this


Important Note: I am using WPS 7.0 and i followed the instructions in the Info center but somehow the trace was not getting enabled, so i did some manual changes to fix this problem

Using custom dynamic content spot in PageBuilder2 theme

Page Builder2 theme makes use of dynamic content spots, which are nothing but .jsp's that are included in theme.html. I wanted to see if i can create a custom dynamic content spot and include it in my theme so i tried these steps and it worked


  • First i did create a simple testds.jsp file, it looks like this

    <h3>This is sample text generated by testds.jsp</h3>

    I am just generating one h1 element inside the testds.jsp

  • Then i copied the testds.jsp file inside the /PortalServer/theme/wp.mashup.cc.theme/installedApps/wp.mashup.cc.theme.ear/PageBuilder2.war/themes/html/PageBuilder2 folder like this


  • Once your testds.jsp is copied into the PageBuilder2.war you have two options for including it in the theme.html, one is directly using the path to PageBuilder2 and second is using the dynamic content spot matching service

    <a rel="dynamic-content" href="res:/PageBuilder2/themes/html/PageBuilder2/testds.jsp"></a>

    <a rel="dynamic-content" href="dyn-cs:id:testds@tl:oid:csa2.theme"></a>


    In this the href="res:/PageBuilder2/themes/html/PageBuilder2/testds.jsp" is sample of how you can directly include the testds.jsp inside your theme.html, it does not require any further steps

    But if you dont want to hardcode path to testds.jsp in your theme.html then you can can create a mapping in the dynamic content spot mapping service and use the mapped name. In my case i did create mapping to testds name so i have to use dyn-cs:id:testds@tl:oid:csa2.theme as value of href

  • Next step is to create mapping that maps testds name to res:/PageBuilder2/themes/html/PageBuilder2/testds.jsp, you will have to use WAS Admin console


With mapping in place i copied my theme_en.html file to the nls folder and now when i try accessing the portal page i can see the testds.jsp getting included once because of direct .jsp reference and once because of content spot mapping reference like this


Important Note: After i copied testds.jsp in the PageBuilder2 theme i tried accessing theme.html and first it was throwing test.jsp not found error but then i did export of PageBuilder2.war and updated it and it started working, you might want to do same thing in ND environment.

Customizing Person card actions

You can use the theme to add items to the Person card's More actions menu in any portlet that uses the AJAX person tag. I wanted to try this feature and it seems that there is one error in the steps provided in Info center

  • First i had to add following code to the theme_en.html(theme_en.html is static html page used by PageBuilder2 theme to decide layout of the page), this code declares Test Action


    <div class="com.ibm.portal.action" style="display:none;">
    <span class="action-id">test.action1</span>
    <span class="action-impl">/javascript/TestAction.js</span>
    <span class="action-context">person</span>
    <span class="action-label">Test Action</span>
    <span class="action-description">This is a test for extending Person menu</span>
    <span class="action-showif">TestAction.showif</span>
    <span class="action-url">javascript:TestAction.execute(@@@ARGS@@@)</span>
    <span class="action-order">0</span>
    </div>


  • Next create TestAction.js file like this

    var TestAction = {
    showif: function(person) {
    return true;
    },
    execute: function(person) {
    alert("TestAction executed for: " + person.fn);
    }
    }

    The showif function gets called by the theme to decide if the TestAction should be displayed for persontag. I am returning true always, so the Test Action will always get displayed.

    The execute function will get called when user clicks on the Test Action. Here i am displaying alert with user name

  • As per Info center i can copy the TestAction.js in the JavaScript folder on webserver but it seems that part does not work,


    When i tried accessing the Person Tag, i could see that it was making a request to /wps_semanticTag/javascript/TestAction.js?language=en_US URL and that was failing so the Test Action did not get displayed.

  • I did some debugging to figure out what is happening and it seems that the logic related to read the com.ibm.portal.action micro-format is part of semanticTagService.js, there is JavaScript function which reads value of action-impl, which is /javascript/TestAction.js in my case adds /wps_semanticTag to it and includes that javascript using script tag in the page

    loadScript: function() {
    var scriptElem = document.createElement("script");
    var url = SemTagSvcPortal.connUrl;
    url += (url.indexOf("?")==-1)? "?": "&";
    url += "lang=" + SemTagSvcPortal.lang;
    scriptElem.src = url;
    document.body.insertBefore(scriptElem, document.body.firstChild);
    }

    Since i dont have anything in that directory it fails
  • So i spent some time trying to figure out which application is mapped to the /wps_semanticTag url and it seems that there is liveobjects.war file like this


    So i copied my TestAction.js to /software/IBM/WebSphere/PortalServer/ui/wp.tagging.liveobject/semTagEar/Live_Object_Framework.ear/liveobjects.war/javascript folder and tried again and now it works


YOu can also extend the person tag at portlet level by adding the <div class="com.ibm.portal.action" style="display:none;"> inside the portlet markup. I changed my persontag.jsp so that it looks like this

<%@page language="java" contentType="text/html; session="false"%>
<%@taglib prefix="person" uri="/WEB-INF/tld/people.tld"%>
<%@taglib uri="http://java.sun.com/portlet" prefix="portlet"%>
<%@taglib uri="http://www.ibm.com/xmlns/prod/websphere/portal/v6.1/portlet-client-model"
prefix="portlet-client-model"%>
<portlet-client-model:init>
<portlet-client-model:require module="ibm.portal.xml.*" />
<portlet-client-model:require module="ibm.portal.portlet.*" />
</portlet-client-model:init>
<portlet:defineObjects />

<h3>PersonTag Portlet</h3>

<person:person value="uid=sunil,o=defaultWIMFileBasedRealm" valueType="LDAPDN" displayName="Sunil Patil" /> <br/>
<person:person value="uid=jiya,o=defaultWIMFileBasedRealm" valueType="LDAPDN" displayName="Jiya Patil" />

<div class="com.ibm.portal.action" style="display:none;">
<span class="action-id">test.action2</span>
<span class="action-impl">/javascript/TestAction.js</span>
<span class="action-context">person</span>
<span class="action-label">Test Portlet Action</span>
<span class="action-description">This is a test for extending Person menu inside portlet</span>
<span class="action-showif">TestAction.showif</span>
<span class="action-url">javascript:TestAction.execute(@@@ARGS@@@)</span>
<span class="action-order">0</span>
</div>


Now when i try accessing the person tag i see Test Action contributed by theme.html and Test Portlet Action contributed by portlet, but the second menu shows up only when i access the persontag inside the portlet.

Using Person Tag inside custom portlet

The Collaborative Services include a JavaServer Page tag language descriptor (TLD) for a person tag. When added to your custom portlet, the person tag causes people's names to appear as hyperlinks, and the Click for Person Card option to display when the user moves the cursor over an active (underlined) person's name. Clicking this option displays the Person card. If WebSphere Portal cannot identify the person name, it displays the name as plain text and the Click for Person Card option is not available.

By default, the Person card includes the action Profile. The Send Mail action displays if the user has an e-mail address. If Lotus Sametime is installed and enabled to work with the portal, the person tag adds an icon that indicates the person's online status and additional actions:

I wanted to try this feature, so i used following steps

  • First you need to find out either EMAIL, LDAPDN or MembmerDN of the user that you want to display. In my local environment my portal is not integrated with LDAP, i am using default file based registry that ships with portal out of box. So first i checked the users that are available in the wp_profile/config/cells/localhost/fileregistry.xml


  • I have 3 users in my local file registry one is wasadmin, other is sunil and jiya. I wanted to display person tag for sunil and jiya so i created a persontag.jsp in my portlet like this

    <%@page language="java" contentType="text/html; session="false"%>
    <%@taglib prefix="person" uri="/WEB-INF/tld/people.tld"%>
    <%@taglib uri="http://java.sun.com/portlet" prefix="portlet"%>
    <%@taglib
    uri="http://www.ibm.com/xmlns/prod/websphere/portal/v6.1/portlet-client-model"
    prefix="portlet-client-model"%><portlet-client-model:init>
    <portlet-client-model:require module="ibm.portal.xml.*" />
    <portlet-client-model:require module="ibm.portal.portlet.*" />
    </portlet-client-model:init>
    <portlet:defineObjects />

    <h3>PersonTag Portlet</h3>

    <person:person value="uid=sunil,o=defaultWIMFileBasedRealm" valueType="LDAPDN"
    displayName="Sunil Patil"></person:person> <br/>
    <person:person value="uid=jiya,o=defaultWIMFileBasedRealm" valueType="LDAPDN"
    displayName="Jiya Patil"></person:person>


    First you will have to include /WEB-INF/tld/people.tld tag library in the JSP and then you can use the person:person tag to display name of the person as person tag. I am using hard coded names to keep it simple but you can easily mix it with PUMA API

  • Once the portlet is deployed you can add it on a page and when you take your move on person's name it will display "Click for person Card" context menu, when you click on the menu, that person's card would be displayed like this


Code generated by client model init tags

If you want to use the Enabler API in your portlet then you will have to include following code at the top of the JSP


<%@taglib uri="http://www.ibm.com/xmlns/prod/websphere/portal/v6.1/portlet-client-model"
prefix="portlet-client-model"%>

<portlet-client-model:init>
<portlet-client-model:require module="ibm.portal.xml.*" />
<portlet-client-model:require module="ibm.portal.portlet.*" />
</portlet-client-model:init>


These JSP tags generate following code into your markup

<script>
if(typeof dojo=='undefined') {
document.writeln("<scr"+"ipt src='/wps/themes/dojo/portal_dojo/dojo/dojo.js' ></scr"+"ipt>");
}
</script>
<script>
dojo.require('ibm.portal.xml.xpath');
dojo.require('ibm.portal.xml.xslt');
</script>
<script>
dojo.require('ibm.portal.portlet.portlet');
</script>
<script>
if(typeof(ibmPortalConfig) == "undefined") {
ibmPortalConfig = {contentHandlerURI: "wsrp_rewrite"};
} else if(!ibmPortalConfig["contentHandlerURI"]) {
ibmPortalConfig["contentHandlerURI"] = "wsrp_rewrite";
}
</script>
<div id="com.ibm.wps.web2.portlet.root.Z7_OGFLMKG100AE00IQD0B8FL3042"
style="display: none;">
http://192.168.117.132:10039/wps/mycontenthandler/!ut/p/digest!Mm2hqcemQRtdiuTGl0RuBg/pm/oid:--portletwindowid--@oid:Z6_OGFLMKG100F610IAJQLHQ800G1
</div>
<div id="com.ibm.wps.web2.portlet.preferences.Z7_OGFLMKG100AE00IQD0B8FL3042" style="display: none;"
pageid="Z6_OGFLMKG100F610IAJQLHQ800G1" configid="Z3_OGFLMKG100AE00IQD0B8FL3081" editdefaultsid="Z5_OGFLMKG100AE00IQD0B8FL3046">
</div>
<div id="com.ibm.wps.web2.portlet.user.Z7_OGFLMKG100AE00IQD0B8FL3042" style="display: none;">
http://192.168.117.132:10039/wps/mycontenthandler/!ut/p/digest!Mm2hqcemQRtdiuTGl0RuBg/um/secure/currentuser/profile?expandRefs=true
</div>


The code takes care of first including dojo on page, if its not loaded already then it includes dojo related classes and then it generates couple of hidden div's that has values of portlet Window Id and page id. Then it generates URls which can be used for getting ATOM feed
http://192.168.117.132:10039/wps/mycontenthandler/!ut/p/digest!Mm2hqcemQRtdiuTGl0RuBg/pm/oid:Z7_OGFLMKG100AE00IQD0B8FL3042@oid:Z6_OGFLMKG100F610IAJQLHQ800G1 url can be used for getting ATOM feed for the current portlet and the http://192.168.117.132:10039/wps/mycontenthandler/!ut/p/digest!Mm2hqcemQRtdiuTGl0RuBg/um/secure/currentuser/profile?expandRefs=true URL can be used for getting ATOM feed for the current user's profile

What is enabler API

WebSphere Portal, has introduced Enabler API in Version 7.0, The Enabler API is replacement of Client Side API that was part of the 6.x version. The Enabler API allows you to do following things on client side


  • Manipulate portlet preferences

  • Manipulate user profile

  • Manipulate portlet state

    • Portlet Mode

    • Window State


The Enabler API provides functions that are equivalent to the Portlet client side API and there is one set of functions that can be used from iWidget and other set that can be used from portlet code.

Ex. In WPS 6.0 this is how we use to set portlet preferences

var _portletWindow = new ibm.portal.portlet.PortletWindow("<%=portletWindowID%>");
_portletWindow.getPortletPreferences(setPreference);
function setPreference(){
portletPrefs.setValue(preferenceName,preferenceValue);
portletWindow.setPortletPreferences(portletPrefs,printPreferencesCallback);
}


But now you will have to use code like this inside the Portlet

var navigationModel = com.ibm.mashups.enabler.navigation.Factory.getNavigationModel();
var selectedNode = navigationModel.find().start();
var layoutModel = navigationModel.getLayoutModel(selectedNode);
var layoutControl = layoutModel.find().start();
var widgetInstance = widgetModel.getWidgetWindow(layoutControl).start();

// set preferences
var modifiablePreferences = widgetModel.getHierarchicalPreferences(widgetInstance).start();
modifiablePreferences.setValues(key, values);

// commit
this.widgetModel.commit().start();


This is the code that you can use inside the iWidget

var result = iContext.getiWidgetAttributes();
result.setItemValue(itemName, itemValue);


Important Note: IBM deprecates the client side programming model from the previous versions. Although the old model still works, developers are encouraged to write new code to comply with the new Enabler APIs. with the old API.

Modify title, metadata properties of page using WebDav client

WPS 7.0 provides one more option for managing your portal pages, which is WebDav. Every portal page is not represented as folder in your WebDav.


On my local the Home -< Fun folder has 5 pages so when i go to corresponding folder in WebDav i see 5 folders. Name of the folder is either ObjectId or unique name. If i go inside a folder that represents a portal page this is what i see


  • localized_en.properties: This is properties file that has value of title and description for the page

  • metadata.properties This file represents the meta data for the page

  • staticcontent: This folder has information about the static content, such as layout.html and option to change the value


This is how the localized_en.properties file for my page looks like, if i change this file and save it using WebDav those changes get stored in the portal database. Ex. I can rename the portal page by changing value of title property in this file


description= Test PageBuilder 2 theme description
title=Test PageBuilder2 Theme


If you want to change any page level meta data values such as caching related data or template file name then you can open metadata.properties file change the corresponding value and save it back. This is how the metadata.properties file for my sample page looks like

com.ibm.portal.bookmarkable=Yes
com.ibm.portal.feed.remote-cache-expiry=86400
com.ibm.portal.layout.template.expiration=1285007105961
com.ibm.portal.IgnoreAccessControlInCaches=false
com.ibm.portal.layout.template.file.name.html=layout.html
com.ibm.portal.remote-cache-expiry=86400
com.ibm.portal.layout.template.ref=dav\:fs-type1/layout-templates/2ColumnEqual/
com.ibm.portal.layout.template.markup=html
com.ibm.portal.layout.template.lastmodified=1285007107434
com.ibm.portal.static.page.file.name.html=layout.html
com.ibm.portal.remote-cache-scope=NON-SHARED

Using WebDAV to manage portal pages

The WebSphere Portal 7.0 allows you to manage portal pages using the WebDav tool. It allows you to do following things


  • Browse through the page hierarchy. Each portal page is represented as a folder. The name of the folder is the unique name or the object ID of the page. Children pages in the topology are represented as subfolders.

  • Change globalization information of pages. To do this, users edit and save properties files that contain the globalization information.

  • Change metadata of pages. To do this, users edit and save properties files that contain the metadata information.

  • For static pages, you can browse, read, create, update, save, copy, move, and delete static content. Users can access the content of static pages via the subfolder staticcontent .

  • Delete pages.


I wanted to try this feature so first i created a WebDav connection to the http://localhost:10039/wps/mycontenthandler/dav/contentmodel/wps.content.root url like this


Once the connection is established i can see all the pages in my portal in the directory format. This is screen shot of my portal page which displays all the pages at the Content Root level


This is how they are represented in the WebDav repository. There is a folder corresponding to every portal page and lable. If you drill down in the folder you will notice there is folder corresponding to every child page,..

Working with PageBuilder2 theme .html, theme.html, skin.html

For last few days i was struggling to figure out how to modify theme.html and finally i got help from my colleagues Evan and Sanjay and now i am able to modify markup generated for theme.html. Take a look at the screen shot, i did add <h1>This is test modification in theme.html</h1> as first element to the body tag


You will have to use following steps to get it working


  • First of all create WebDav connection to /wps/mycontenthandler/dav/fs-type1 URL, this is the URL that you should use. It seems that http://localhost:10039/wps/mycontenthandler/dav/themelist url is not a valid URL for WebDav, it will keep throwing some weired error


  • Once your WebDav connection is established go to themes/PageBuilder2 folder, you will find a theme.html file here and there is locale specific version of theme.html in nls folder. I tried changing the theme.html in PageBuilder2 folder but somehow it never gets picked up instead portal always picks up locale specific version from nls folder


  • Make changes in theme.html and save those changes, if your using WebDav client(WebFolders, BitKinex) on Windows, first you will have to copy the file to local machine, modify it and then copy it back


Once your changes are updated you can refresh the page and you should be able to see the modified markup