Attaching shared library to deployed portlet

Some times you might not want to copy all the .jar files that your portlets require in the server shared lib instead you might want to attach them only to every deployed portlet.

Ex. Lets say you want to use a different JSF library in your portlets so instead of copying those .jars in shared/app you want to create a separate shared lib and attach it to every deploy portlet, you can configure Deployment service to solve this use case

Follow these steps

  • Create a shared lib containing your jars using Create shared library instructions

  • Now next step is to configure Deployment Service. For that first login into the WAS Admin Console. Go to Resources -> Resource Environment -> Resource Environment Provider


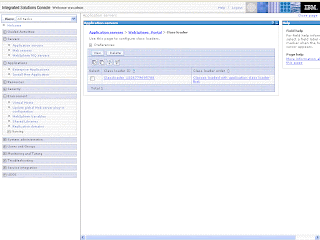
  • Click on the WP DeploymentService link it will take you the WP DeploymentService details like this


  • On this screen click on new and add new portletapp.shared.library.list property like this. In this value of the Value field should be name of the shared library or comma separated list of name of shared libs

    Click ok to save your changes.

  • Now restart the server for your changes to take effect

  • Once server is restarted you can deploy a portlet and once the portlet is deployed you will notice that the shared lib is attached to the .ear file of that portlet and portlet is aable to access the classes in that shared lib


Application Level shared lib

The Application Level Shared Lib allows you to attach shared lib to particular enterprise application or .war file inside enterprise application. Follow these steps


  • Create testsharedlib shared library by following the steps defined in Create Shared Lib section

  • In the WAS Admin Console, Go to Application -> Enterprise Applications, select the application that you want to attach this shared lib to. I want to attach it to PA_SharedLib enterprise application. So its detail screen looks like this


  • Click on Shared Library references link in the References section, it will display list of shared library referenced from both .ear and the .war file inside the .ear


  • I want to attach the shared lib to the SharedLibPortlet, so select it and click on Reference Shared Libraries button


  • It is displaying list of available shared libraries on the left hand side, select the testsharedlib and add it to selected section.


  • When you click on Ok it will take you to the previous screen and now you will be able to see the testsharedlib being attached to SharedLibPortlet


After making this change i tested my enterprise application and it was able to access the classes defined in the shared lib. If that does not work try restarting the enterprise application

Server level Shared lib

You can make testsharedlib available at the server level by following these steps

  • Log into the WAS Admin Console. Go to Servers -> Application Servers -> Choose the server instance of your choice. I want to attach it to WebSphere_Portal server so select it.

    This page displays details of the WebSPhere_Portal server.

  • Go to Java and Process Management section under Server Infrastructure section. Click on the class loader

    This screen displays all the class loaders attached to the WebSphere_Portal server

  • Click on the Class loader name and it will take you the class loader details screen like this


  • Click on the shared libraries link on this screen. It will display list of shared libraries attached to the server instance like this


  • Click on New button to start the process of creating new shared lib.

    On this screen the list box would display list of shared libraries available, select the one you want and click oK to add the shared lib


Now restart the server for these changes to take effect

Shared Library

Shared libraries allow you to attach set of .jar files to application or server. Ex. Most of the portlets in your company are using JSF as MVC framework or say set of Apache Axis jars so instead of copying all the .jar files required by portlets in the WEB-INF/lib folder of every portlet you can create a directory on your server copy all the required jars in that directory and add that directory to the classpath of either your server or your portlet application.

Creating a shared library


You can create a shared library by following these steps

  • Create c:\temp\shared directory on your machine and copy all the .jar files in this directory

  • Log into the WAS Admin console and go to Environment -> Shared Libraries. Choose the appropriate scope and click on New

    On this screen assign name to the shared lib and set the class path for that shared lib.


This is how you create testsharedlib shared library.

Now you have two choices either you can make this shared lib available to all the enterprise applications in your server, which is called server level shared lib or you can assign this shared libs to few applications by adding application level shared lib.

Step-up authentication

I was going through What's new in the IBM WebSphere Portal 6.0.1 and 6.1 Programming Model, slides and it has couple of Step-up Authentication- Application Flow.


The basic idea is if your not logged in you see data but when you want to perform say write operation or operation that requires user be logged in then you ask user to log in.

By default portal has concept of Anonymous User and All Authenticated Users. If you want to display a public page or display portlet on public page you can assign anonymous user rights and it works.

In Portal 6.1 there is concept of Remember Me cookie, that can remember the user who logged in from that browser and give you access to his name even before he is logged in. Because of Remember Me cookie portal has one additional authentication state identified, which happens when user's id is stored as persistent cookie on the browser and when he accesses the portal page the portal can identify user even before he logs in.

You can use identified authentication level to display few portlets or pages to user even if he is not logged in but if portal can identify the user from the remember me cookie.

In order to try this feature i decided to create Remember Me page, on that page i did add Remember Me portlet, which reads user name and prints it to System.out,(You can change it to display it on screen). I wanted to display this to only identified user. I followed these steps to do that


  • Assign Anonymous User - User access rights to both Remember Me page and Remember Me portlet

  • Then use Resource Permission Portlet to change access level of the Remember Me page and Remember Me portlet, like this. On this screen click on Standard Link


  • On the next page you will see three authentication levels like this

    Change the authentication Level to Authenticated. Assign authenticated level to both Remember Me page and Remember Me portlet


Now when you access portal and your not identified you wont see remember me page and portlet. But if your identified you will see that page.

This is list of authentication levels.

  1. Standard: Default and context-related authentication level

  2. Identified: User authentication using a persistent HTTP cookie

  3. Authenticated:User authentication using username and password


When you try to access authenticated resource user would be redirected to the login page.

Sample Remember Me cookie Portlet

This sample Portlet demonstrate how to use Remember Me cookie service to find out userId for the user on anonymous page.


public class RememberMePortlet extends javax.portlet.GenericPortlet {
PortletServiceHome psh;
/**
* @see javax.portlet.Portlet#init()
*/
public void init() throws PortletException{
super.init();
try {
javax.naming.Context ctx = new javax.naming.InitialContext();
psh = (PortletServiceHome)ctx.lookup(RememberMeCookieService.JNDI_NAME);
} catch (NamingException e) {
// TODO Auto-generated catch block
e.printStackTrace();
}
}

public void doView(RenderRequest request, RenderResponse response) throws PortletException, IOException {
// Set the MIME type for the render response
response.setContentType(request.getResponseContentType());

try {
RememberMeCookieService rememberMeService = psh.getPortletService(RememberMeCookieService.class);
if(rememberMeService.isRememberMeCookieEnabled()){
System.out.println("RememberMeCookie is enabled");
System.out.println("User Name " + rememberMeService.getUserID(request));
System.out.println("Is Remember Me Cookie Set " + rememberMeService.isCookieSet(request));
response.getWriter().println("Invalidate remember me cookie");
}else{
System.out.println("RememberMeCookie is disabled");
}
} catch (SecurityException e) {
e.printStackTrace();
}
}
}


You can download this portlet from here

Enable Remember Me Cookie

You can follow these steps to Enable Stepup Authentication on your server

  • Log into the WAS Administrative COnsole and go to Security > Secure administration, applications, and infrastructure > Web security > Single sign-on (SSO).
    Verify that both Interoperability Mode and Web inbound security attribute propagation are enabled


  • Open the wkplc.properties file and set values for following properties

    # Defines the key which is used to encrypt the Cookie information
    # sua_user does not need to match to a real user e.g use myname as value
    # sua_serversecret_password will be used as the key
    sua_user=remembermeuser
    sua_serversecret_password=remembermepassword

    #Defines if Rememberme should be enbled during enable-stepup-authenticatoin
    #
    #
    enable_rememberme=true


  • Execute the enable-stepup-authentication Configuration task by executing this command

    ConfigEngine.bat enable-stepup-authentication -DWasUserid=wasadmin -DWasPassword=wasadmin


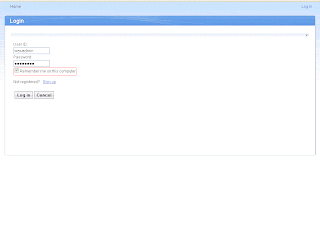
  • Once the configuration task is completed successfully. Restart the server, when server is up again, you should be able to see the Remember Me on this Computer checkbox on the Login page

    Enter your user name, password and check the Remember Me checkbox and click on Login. When you do that one persistent cookie would be written to your browser. My persistent cookie looks like this

    com.ibm.portal.RememberMe
    7mNt_buvPqUrKCpE6DXBb9U7OwewlrnAKQvjT168RoQ8oNm6MUMun8M7uKiYfQr8XbSXYT4CJXf7ycMv_zlsq42UuqRW1wV7QQeFyZn9v0B4_qlyRlOXBouF9fSEvgj-
    localhost/
    1024
    1327819264
    29999016
    630635760
    29998815
    *


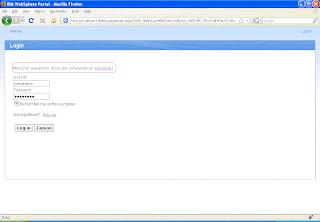
  • Now logout or close the browser window and open it again and it will show you name of the user that was used for logging and saving remember me cookie.


Rememeber Me Cookie

Step-up authentication provides authentication levels for pages and portlets. The Remember me cookie is an encrypted HTTP cookie that supports state-of-the-art authentication, which allows you to present personalized portlets and pages in a public area without asking the user to manually authenticate. Together, these two features allow remembered users to view anonymous pages and portlets with a standard or identified authentication level. By providing a valid Remember me cookie, a user can also be allowed to access protected pages and portlets that require the identified authentication level. If the authentication level is set to authenticated, the user will have to provide a user ID and password to view the page or portlet.

Important: The Remember me cookie does not extend the Portal Personalization feature to the public area because a user identified by the Remember me cookie in a public area is still considered anonymous from an access control point of view.
Restriction: Step-up authentication is not supported by the Web Content authoring portlet or when delivering content using a local or remote Web Content Viewer portlet.
Restriction: Step-up authentication requires the LtpaToken2 for single sign-on; see Implementing single sign-on to minimize Web user authentications for details.

How Portlet title is calculated

Does it ever happened to you that you deployed a portlet and then you noticed that there was spelling mistake in the Portlet title, you try changing the title in portlet.xml but it does not affect the title that is getting displayed. I had that problem some time back so i debugged to figure out how the portlet title gets calculated.

The Portlet title can be set in one of the three different places

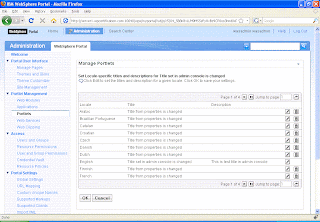
1) Highest priority is given to the Portlet title set/overriden in the Manage Portlet


2) If you havent changed the Portlet title in Manage Portlet, portlet then second priority is given to the value of javax.portlet.title property in the portlets resource bundle.

javax.portlet.title=Title from properties is changed
javax.portlet.short-title=TitleTestPortlet
javax.portlet.keywords=TitleTestPortlet

then in the portlet.xml file the resource bundle is defined like this.

<resource-bundle>com.ibm.titletestportlet.nl.TitleTestPortletResource</resource-bundle>


3)If you havent over ridden title in the portlet title in the Portal Admin Console or you havent specified in the Resource bundle in the portlet.xml then it will be pick up from the portlet.xml


<portlet-info>
<title>TitleTestPortlet</title>
<short-title>TitleTestPortlet</short-title>
<keywords>TitleTestPortlet</keywords>
</portlet-info>

Business Process Integration Installation restrictions

WPS provides business process integration support throug IBM WPS. Because a cluster must consist of identical copies of an applicaiton server, either every instance of WPS must be installed with WebSphere Process Server or every instance of WebSphere Portal must be installed without WebSphere process server.

Business process support cannot be federated into a Deployment Manager managed cell after installation.

Configure Page Layout

If you want to add more portlets to a page or change default layout of the page by going to Manage Pages Portlet, selecting the page that you want to Edit and clicking on its Edit Page Layout button like this


It will open Edit Layout page like this. On this page Portal provides 6 different options to choose from, that you can choose to define what layout of the page you want


If you have advanced requirements that cannot be fulfilled by one of the default layouts then click on Show Layout Tools Link, if you dont get that link Go to Configure mod of the Edit Layout portlet and check 'Show toggle link for "Show layout tools/hide layout tools"' check box


Now when you come back to the Edit Layout page, you should get this link, click on the Show Layout Tools button and you will get a more flexible layout like this, now you can click on the add column container or add row container buttons to create a page with say 4 columns.

Database Transfer Manually

If you dont want to use Configuration Wizard or cant use Configuration wizard for some reason then you can use Manual process for database transfer. The manual process can be divided into 3 basic sections

Creating necessary JDBC Provider and Data Source


You will have to

  • First create a wpdbJDBC_db2 JDBC Provider for connecting to DB2

  • Configure a wpdbDS as datasource, use same value for name and JNDI name

  • Restart the server and make sure that Test Connection is successful for this Data source


Important Note: When you create a new DataSource, you might create a new J2C security alias with it. In order for security alias to get effective, the server must be restarted.


Modifying the .properties file


The Database configuration is spread into three different configuration files so you will have to update all those configuration files.

wkplc_dbtype.properties


This configuration file defines the database properties such as Driver class name, JDBC Class path, etc. Configure it like this.

###############################################################################
# DB2 Properties
###############################################################################

# DbDriver: The name of class SqlProcessor will use to import SQL files
# For DB2 Type 2 driver use COM.ibm.db2.jdbc.app.DB2Driver
# For DB2 Type 4 driver use com.ibm.db2.jcc.DB2Driver
db2.DbDriver=com.ibm.db2.jcc.DB2Driver

# DbLibrary: The directory and name of the zip/jar file containing JDBC driver class
# For DB2 Type 2 driver use /java/db2java.zip
# For DB2 Type 4 driver use /java/db2jcc.jar;/java/db2jcc_license_cu.jar
# Please use the system specific file separator names, e.g. for windows semicolon and for unix colon.
db2.DbLibrary=/opt/ibm/tdsdb2V9.1/java/db2jcc.jar;/opt/ibm/tdsdb2V9.1/java/db2jcc_license_cu.jar

# JdbcProviderName: The name of jdbc provider to be used
db2.JdbcProviderName=wpdbJDBC_db2


wkplc_comp.properties


This file has detailed information for each of the database domains. You will have to enter following set of properties for each of the database domains. This is sample for release domain.

release.DbType=db2
release.DbName=WPSDB
release.DbSchema=release
release.DataSourceName= wpdbDS
release.DbUrl=jdbc:db2://localhost:50000/wpsdb
release.DbUser=db2admin
release.DbPassword=db2admin

Similarly enter values for other domains such as jcr,customization,community, likeminds,..


Executing Configuration task


Once the properties files are setup we will have to execute configuration tasks to first verify the data entered is correct or not and then to actually do the database transfer.

  • First execute this command to verify the values that you entered in wkplc_dbtype.properties file

    ConfigEngine.bat validate-database-driver -DTransferDomainList=release,customization,community,
    jcr,feedback,likeminds

    Important Note: When i tried executing validate-database-driver configuration task with value of db2.DbLibrary equal to /opt/ibm/tdsdb2V9.1/java/db2jcc.jar;/opt/ibm/tdsdb2V9.1/java/db2jcc_license_cu.jar, i got invalid separate character. So i removed the ; and part after it and retried executing the validate-database-driver and it worked. After that i did revert back to the original or else the next validation fails

  • Now verify the information that you entered in wkplc_comp.properties file by connecting to the data sources by executing this command

    ./ConfigEngine.sh validate-database-driver -DTransferDomainList=release,customization,community,jcr,feedback,likeminds


  • Once both the verifications are completed stop both server1 and WebSphere_Portal server

  • Now start the actual DB transfer configuration task by executing
    ConfigEngine.bat database-transfer -DTransferDomainList=release,customization,community,jcr,
    feedback,likeminds


On my local machine with both Portal and DB2 on same machine this task took 30 minutes to complete.

Check the wp_profile\ConfigEngine\log\portal-database-transfer.log at the end to make sure that the database transfer was successful.

Database transfer - Configuration Wizard

The Portal Configuration wizard can be used to transfer data from the Apache Derby Database to the target database.

The Portal Installer allows to launch the Configuration wizard once portal install is complete, you can use that option or if you want you can go to wp_profile/PortalServer/wizard directory and launch wizard by executing configwizard.bat.


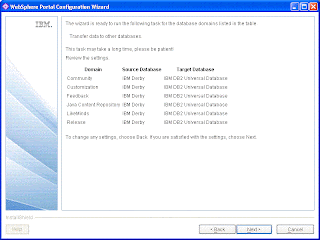
  • Once the wizard is launched, you should get a screen like this, select Transfer data to other database and click next


  • On the next screen, wizard will ask you to enter your administrative userid and password


  • On the next screen it will ask you about which is your source directory, in my case i am shifting from default IBM Derby so it is IBM Derbry


  • On the next screen it will ask you what is your target database type. I am moving data to my IBM DB2 on my local machine so it is IBM DB2


  • On the next page it will ask you more information about the target database, such as where it is located, DB2 servers host name, port


  • After that it will start asking you information specific to each of the portal domains, this is how my customization domain screen looks like


  • On next few screen it will ask you same information for customization,jcr, likeminds and release database. At the end it will show you the summary screen like this


When you click Next on the last screen it will take the information that you entered on the wizard and generate parent.properties file in wp_profile/PortalServerwizard directory with that information. This is how my parent.properties file looks like

db2.DbDriver=com.ibm.db2.jcc.DB2Driver
db2.DbLibrary=C:/IBM/SQLLIB/java/db2jcc.jar;C:/IBM/SQLLIB/java/db2jcc_license_cu.jar
db2.JdbcProviderName=wpdbJDBC_db2
source.release.DbType=derby
release.DbType=db2
release.DbName=wpsdb
release.DbUser=db2admin
release.DbSchema=release
release.DataSourceName=wpdbDS_release
WasUserid=uid=wasadmin,o=defaultWIMFileBasedRealm
release.DbUrl=jdbc:db2://localhost:50000/wpsdb:returnAlias=0;
release.DbPassword=db2admin
WasPassword=wasadmin
source.likeminds.DbType=derby
likeminds.DbType=db2
likeminds.DbName=wpsdb
likeminds.DbUser=db2admin
likeminds.DbSchema=likeminds
likeminds.DataSourceName=wpdbDS_likeminds
likeminds.DbUrl=jdbc:db2://localhost:50000/wpsdb:returnAlias=0;
likeminds.DbPassword=db2admin
source.jcr.DbType=derby
jcr.DbType=db2
jcr.DbName=wpsdb
jcr.DbUser=db2admin
jcr.DbSchema=jcr
jcr.DataSourceName=wpdbDS_jcr
jcr.DbUrl=jdbc:db2://localhost:50000/wpsdb:returnAlias=0;
jcr.DbPassword=db2admin
source.feedback.DbType=derby
feedback.DbType=db2
feedback.DbName=wpsdb
feedback.DbUser=db2admin
feedback.DbSchema=FEEDBACK
feedback.DataSourceName=wpdbDS_feedback
feedback.DbUrl=jdbc:db2://localhost:50000/wpsdb:returnAlias=0;
feedback.DbPassword=db2admin
source.customization.DbType=derby
customization.DbType=db2
customization.DbName=wpsdb
customization.DbUser=db2admin
customization.DbSchema=customization
customization.DataSourceName=wpdbDS_customization
customization.DbUrl=jdbc:db2://localhost:50000/wpsdb:returnAlias=0;
customization.DbPassword=db2admin
source.community.DbType=derby
community.DbType=db2
community.DbName=wpsdb
community.DataSourceName=wpdbDS_community
community.DbUser=db2admin
community.DbSchema=community
community.DbUrl=jdbc:db2://localhost:50000/wpsdb:returnAlias=0;
community.DbPassword=db2admin


It will take this information and execute ConfigEngine.bat database-transfer -DparentProperties=wp_profiles/PortalServer/wizard/parent.properties command to start the configuration.

This process will take some time to complete

Portal data sharing

If your building an 24*7 Portal environment, or environment that can be brought down even for maintenance or upgrade then you will have to use the Golden Architecture defined by IBM.

IBM's Golden architecture defines that you should have two portal servers or two portal clusters, when you bring down one of the clusters for maintenance other takes care of serving user request.

This is how you can setup the database for Golden architecture.


As you can see each of the cluster would get its own release database but they will share customization and community databases with other clusters in the production.

If your clusters are in different location then you only have to replicate community and customization database between them.

How is portal data organized

Portal data is broken into four logical groups, each group has differnet users, charateristics and different rates of access and growht.


  • Configuration data: This is data that defines the portal server setup such as database connections, object factories and deployment descriptor. This configuration data is usually constant over the uptime of a portal server node and is typically kept in property files on the portal servers hard disk and proptected by file system security. Most of this data is managed by the the WebSphere Application Server.


  • Release data: This type of data defines all portal resource definitions, rules and rights. Ex. Portal pages, portlets, page hierarchy, access control rights related information. This type of data is typically not modified during production and need administrative rights to do so.Release data cannot be split or shared and administrator must make sure that the content of the release database is consistent across the different lines.


  • Customization: This is typically only associated with a particular user but it is data that can be shared amongst portal server nodes. Example of customization data is private page or preferences of portlets. Since the data in the customization database applies to single user only, the ACL is greatly simplified.

    In an environment that consist of multiple lines of production, customization data is kept in a database that is shared across the lines of productions. Therefore the data is automatically in sync. across the lines of productions and no matter which line of production the user logs into, that customizations are still available to theme.


  • Community: These are modified during production. This type of data includes items such as shared documents or application resources. Users and groups are allowed to modify or delete data. Community resources are protected by portal access control.

    Community data includes items such as Web Content Management (WCM), and the
    aforementioned Portal Document Manager (PDM). In other words, shared data that is not
    part of the release data.

What is portal database domains

When you install WebSphere Portal server by default it installs Apache Derby database on the target machine and all the portal related data such as Portlet Description, Page definitions, Personalization Rules, Documents are stored in this database.

Storing Portal data in Apache Derby database works if your using standalone development environment but if you want to use clustering or if you want to support more users you will have to migrate your data from the Apache Derby database to some other production quality database like IBM's DB2 or Oracle.

The WebSphere Portal allows you to split the database into different doamins. In this each domain contains data that is related to each other and has specific characteristics about growing. Following are the database domains


  • Releaes

  • Customization

  • Community

  • Releaes

  • JCR

  • Feedback

  • Likeminds


Websphere provides you to very flexible options for managing these data. Either you can create one database and store all the data in it, in which case each of these domains would be stored in separate schemas or you can store say Release and Customization data in DB2 and rest of the data in Oracle.

On my local i am using one DB2 instance WPSDB and storing the different domains in there own schemas. Take a look at screen shot of DB2 Control Center

Cache Invalidation Listener

The Dynamic Cache provides following types of listeners

Invalidation Listener


The Invalidation Listener receive InvalidationEvents (defined in the com.ibm.websphere.cache package) when entries from the cache are removed, due to an explicit user invalidation, timeout, least recently used (LRU) eviction, cache clear, or disk timeout. Applications can immediately recalculate the invalidated data and prime the cache before the next user request.

Ex. In most of the database applications, whenever you retrieve a record from database you can cache it or when user creates a new record instead of directly creating it in database you can create cached entry for it. You keep updating/modifying this record. And when application server is about wipe this record out from memory it will call your invalidation listener at that point you can write that record into database.

This is how you create an InvalidationListener

public class MyInvalidationListener implements InvalidationListener {

public void fireEvent(InvalidationEvent invalidationEvent) {
System.out.println("Entering MyInvalidationListener.fireEvent()");
System.out.println("Cache Name " +invalidationEvent.getCacheName());
System.out.println("Cache ID " +invalidationEvent.getId());
System.out.println("Cache Value " +invalidationEvent.getValue());
System.out.println("Exiting MyInvalidationListener.fireEvent()");
}

}

As you can see i am just printing the invalidated entry into system.out
Then you attach it to your Distributed map using this code

distributedMap= (DistributedMap)context.lookup("wpcertification/cache/customCache");
System.out.println("Distributed Map " + distributedMap);
distributedMap.enableListener(true);
distributedMap.addInvalidationListener(new MyInvalidationListener());


When you get distributedMap from JNDI first you set enableListener to true and then create object of your listener and attach it to the distributed map.

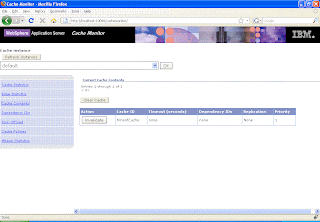
In order to test the invalidation listener, i went to cache monitor application and i did click on the invalidate button next to the entry that i want to invalidate.


WHen the entry was invalidated this is the output that i see in my SystemOut.log

invalidating id: timeofCache
Entering MyInvalidationListener.fireEvent()
Cache Name wpcertification/cache/customCache
Cache ID timeofCache
Cache Value 16:38:16
Exiting MyInvalidationListener.fireEvent()


As you can see i am getting sufficient data to post this cached entry into database.

You can download the modified version of CustomDynaCache portlet to try this listener

Change Entry Listener


If you want you can also attach an listener that gets called every time the cached entry is modified.


public class MyChangeListener implements ChangeListener{

public void cacheEntryChanged(ChangeEvent changeEvent) {
System.out.println("Entering MyChangeListener.cacheEntryChanged()");
System.out.println("Cache Name " +changeEvent.getCacheName());
System.out.println("Cache ID " +changeEvent.getId());
System.out.println("Cache Value " +changeEvent.getValue());
System.out.println("Exiting MyChangeListener.cacheEntryChanged()");

}

}


Then attach the Change event listener to the distributedMap like this

distributedMap= (DistributedMap)context.lookup("wpcertification/cache/customCache");
distributedMap.addChangeListener(new MyChangeListener());


Now when you update the cached entry you should see messages like this in SYstemOut.log

Entering MyChangeListener.cacheEntryChanged()
Cache Name wpcertification/cache/customCache
Cache ID timeofCache
Cache Value 17:16:20
Exiting MyChangeListener.cacheEntryChanged()

Special consideration for Dynamic Cache in clustered environment

If you are using custom object keys, you must place your classes in a shared library. You can define the shared library at cell, node, or server level. Then, in each server create a class loader and associate it with the shared library that you defined.

Place JAR files in a shared library when you deploy the application in a cluster with replication enabled. Simply turning on replication does not require a shared library; however, if you are using application-specific Java objects, such as cache key or cache value, those Java classes are required to be in the shared library.

Forcefully killing the server

There could be situations in which you might want to kill your WebSphere Application Server forcefully either because it is not responding or you want to generate thread dump.

You can do that by first going to wp_profile/logs/<servername> directory and opening the .pid file in the text editor in case of Windows machine you can open the .pid file in Notepad. Inside the .pid file there would be a number which is the process id for that server. Use it to kill the server.


On linux box you can kill it using kill <pid> command and you can generate thread dump by executing kill -3 <pid> command

Application Server Port

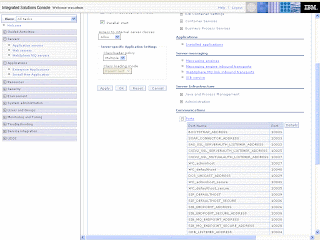
You can find out what all ports your application server is listening on using WAS Admin Console


This might be useful for cases such as you want to find out JNDI context for your portal, if you try to execute the dumpNameSpace.sh command and if server1 is not running you will get


Getting the initial context
ERROR: Could not get the initial context or unable to look up the starting context. Exiting.
Exception received: javax.naming.ServiceUnavailableException: A communication failure occurred while attempting to obtain an initial context with the provider URL: "corbaloc:iiop:localhost:2809". Make sure that any bootstrap address information in the URL is correct and that the target name server is running. A bootstrap address with no port specification defaults to port 2809. Possible causes other than an incorrect bootstrap address or unavailable name server include the network environment and workstation network configuration. [Root exception is org.omg.CORBA.TRANSIENT: java.net.ConnectException: Connection refused: connect:host=sunpatil-wxp.cisco.com,port=2809 vmcid: IBM minor code: E02 completed: No]
javax.naming.ServiceUnavailableException: A communication failure occurred while attempting to obtain an initial context with the provider URL: "corbaloc:iiop:localhost:2809". Make sure that any bootstrap address information in the URL is correct and that the target name server is running. A bootstrap address with no port specification defaults to port 2809. Possible causes other than an incorrect bootstrap address or unavailable name server include the network environment and workstation network configuration. [Root exception is org.omg.CORBA.TRANSIENT: java.net.ConnectException: Connection refused: connect:host=sunpatil-wxp.cisco.com,port=2809 vmcid: IBM minor code: E02 completed: No]
at com.ibm.ws.naming.util.WsnInitCtxFactory.mapInitialReferenceFailure(WsnInitCtxFactory.java:2224)
at com.ibm.ws.naming.util.WsnInitCtxFactory.mergeWsnNSProperties(WsnInitCtxFactory.java:1384)
at com.ibm.ws.naming.util.WsnInitCtxFactory.getRootContextFromServer(WsnInitCtxFactory.java:922)
at com.ibm.ws.naming.util.WsnInitCtxFactory.getRootJndiContext(WsnInitCtxFactory.java:846)
at com.ibm.ws.naming.util.WsnInitCtxFactory.getInitialContextInternal(WsnInitCtxFactory.java:531)
at com.ibm.ws.naming.util.WsnInitCtx.getContext(WsnInitCtx.java:117)
at com.ibm.ws.naming.util.WsnInitCtx.getContextIfNull(WsnInitCtx.java:712)
at com.ibm.ws.naming.util.WsnInitCtx.(WsnInitCtx.java:90)
at com.ibm.ws.naming.util.WsnInitCtxFactory.getInitialContext(WsnInitCtxFactory.java:361)


In order to solve this problem, go to WAS Admin Console find out what is the BOOTSTRAP_ADDRESS for your server and then execute
dumpNameSpace.bat -port <portno>

Custom Cache Instance

If you want to use say 3-4 different caches in your application or you want to better track your cache instance then you can create your own instance of dynamic cache and configure and use it.

You can create custom cache instance either using administrative console or declaratively using your application.

Administrative Console


YOu can create and configure new cache instance using WAS Administrative console. Inside the Administrative Console go to Resources -> Cache Instance -> Object Cache Instance and create a new cache instance like this


Once the instance is created you can access it using

distributedMap= (DistributedMap)context.lookup("/services/cache/samplecache");


Using cacheinstance.properties


Other method of creating cache is that you can create cacheinstance.properties file like this in your WEB-INF/classes forlder. If your using RAD you can create in root of your source folder, so that it gets copied to WEB-INF/classes folder.


cache.instance.0=/wpcertification/cache/customCache
cache.instance.0.cacheSize=1000
cache.instance.0.enableDiskOffload=true
cache.instance.0.diskOffloadLocation=c:/temp/diskOffload
cache.instance.0.flushToDiskOnStop=true
cache.instance.0.useListenerContext=true
cache.instance.0.enableCacheReplication=false
cache.instance.0.disableDependencyId=false
cache.instance.0.htodCleanupFrequency=60


Inside your code you can access the distributed Map object using this code

distributedMap= (DistributedMap)context.lookup("/wpcertification/cache/customCache");


You can download the CustomDynaCache portlet and install it on your server. After installing it try accessing it couple of times and then check it in the CacheMonitor

Caching Custom Objects

The DistributedMap and DistributedObjectCache interfaces are simple interfaces for dynamic cache. Using these interfaces J2EE applications and system components can cache and share java objects by storing references to the object in the cache.

The default dynamic cache instance is created if the dynamic cache service is enabled in the administrative console. The default instance is bound in global JNDI tree at services/cache/distributedmap.

This is the sample code that demonstrate how to use default instance of dynamic cache

public class DynaCachePortlet extends javax.portlet.GenericPortlet {
private DistributedMap distributedMap;
public void init() throws PortletException{
System.out.println("Entering DynaCachePortlet.init()");
super.init();
try {
InitialContext context = new InitialContext();
distributedMap= (DistributedMap)context.lookup("services/cache/distributedmap");
System.out.println("Distributed Map " + distributedMap);

distributedMap.enableListener(true);
} catch (NamingException e) {
e.printStackTrace();
}
System.out.println("Exiting DynaCachePortlet.init()");
}
public void doView(RenderRequest request, RenderResponse response) throws PortletException, IOException {
// Set the MIME type for the render response
response.setContentType(request.getResponseContentType());
System.out.println("Entering DynaCachePortlet.doView()");
String timeOfCache = (String)distributedMap.get("timeofCache");
System.out.println("Value of timeOfCache from Cache " + timeOfCache);
if(timeOfCache == null){
SimpleDateFormat sd = new SimpleDateFormat("HH:mm:ss");
timeOfCache = sd.format(new Date());
System.out.println("Setting value of TimeCache to " + timeOfCache);
distributedMap.put("timeofCache", timeOfCache);
}
response.getWriter().println("Hello from distributedCache " + timeOfCache);
System.out.println("Exiting DynaCachePortlet.doView()");
}
}


Actually using Dynamic Cache is pretty simple, all you have to do is lookup the distributedMap object from the cache and then you can store and retrieve objects from it as normal Hashmap.

In this sample when you go to the View mode of the portlet for first time it will store the current time in the cache and thereafter whenever you go back to the VIEW mode it will always return the same time from cache. I know this is very simple but our main goal is to learn how to use cache.

If you want you can download the DynaCache Sample portlet. Now install it on your portal and once installed try hitting it few times.

If you have not installed Cache Monitor already, install it and then go to it, you should be able to see the default instance in the instance list select it and click on go


It will display the cache statics for the dyna cache. In our case we are saving only one key in cache which is timeofCache so value of Used Entries is 1 and if you refreshed the page 3 times then the cached entry would be accessed 2 times so the value of Cache Hits would be 2


Click on Cache Contents links to go to the page that displays what all keys are stored in cache

Installind Extending Dynamic Cache Monitor

http://www.ibm.com/developerworks/websphere/downloads/cache_monitor.html#download

Enabling dynamic caching

You will have to enable the dynamic caching on your server if its not already enabled. You can use the WebSphere Application Server Administration Console to do that. Follow these steps


  • Log into WebSPhere Application Server Admin Console

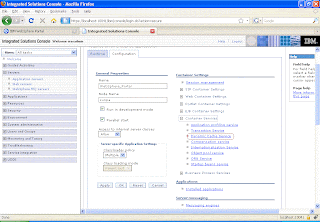
  • Go to Servers -> WebSphere_Portal or if your using normal WAS then server1

  • On the server details page expand Container Services and click on Dynamic Cache Service


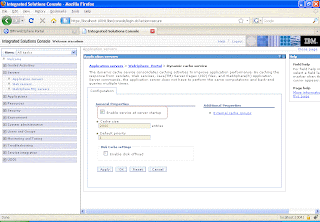
  • On the Dynamic Cache Service page make sure that "Enable Service at server startup" check box is checked.


  • Save your changes and restart the server

Remote Search Service

You can configure the search portlets for local operation, or you can configure them for remote search service. Depending on your configuration, remote search service might have performance benefits by offloading and balancing system load.

You can provide the remote search service either as an EJB or as a Web service via SOAP. With EJB you can have security enabled. With SOAP this is not possible.

When you want to index and search portal sites, search results are filtered according to the user security credentials. This filtering occurs independently of whether security is enabled on the remote search server or not. However, if security is not enabled, an unauthorized user can connect to the remote server and obtain unfiltered search results. If you want to prevent this, you need to use EJB and enable security on the remote server.

Configuring Portal Search in a cluster

To support Portal Search in a clustered environment, you must install and configure search for remote search service on an IBM WebSphere Application Server node that is not part of the IBM WebSphere Portal cluster.

To install and configure the search service remotely, perform the following tasks:

1. Install and configure the search service to work remotely, that is, on a remote WebSphere Application Server node which is not part of the portal cluster. You can provide the remote search service either as an EJB or as a Web service via SOAP. Deploy the appropriate EJB or SOAP EAR file on the remote WebSphere Application Server node. For details about how to do this, refer to the WebSphere Application Server documentation.
2. Configure the search portlets for remote search service so that they access the remote server accordingly.

To enable search in a cluster for content stored in the JCR database, you must configure each machine in the cluster to access a shared directory. JCR-based content includes content created with Web Content Management or Personalization.
Create a shared directory called jcr/search on a machine in the network and ensure that each node in the cluster has network access to the directory.

Enabling anonymous users to search public pages of your portal

You can enable anonymous users (sometimes also called unauthenticated users) to search public pages of your portal by using a portal search portlet.

To do this, make the Search and Browse portlet or the Search Center portlet available on a public page of your portal, so that users can access them without having to log in to the portal.

You also need to enable public sessions for your portal. The reason is that both the Search and Browse portlet and the Search Center portlet need a valid session for their run time, and by default, sessions are not enabled on anonymous pages in the portal. By default, sessions are only created when a user authenticates and logs in to the portal.

Take a look at Infocenter document for step by step procedures on how to enable search for anonymous users

Publishing personalization rules over SSL

By default the personalization rules are published on HTTP, but if you want you can change this to use Secured connection. If you decide to use the secured connection then you will have to make following configuration changes so that the authoring system can connect to run-time system on secured port. Follow these steps to do that

1. Export the SSL certificate from the trust store of your publish server's Web server (see the WebSphere Application Server InfoCenter for help using the keytool utility for importing and exporting SSL certificates).
2. Stop the authoring server.
3. Import the SSL certificate into the WebSphere Application Server trust store on the authoring server (by default, this is located at /java/jre/lib/security/cacerts). If your authoring server is configured to use an external Web server, you must also import the SSL certificate into the Web server's trust store.
4. Start the authoring server. The authoring server should be able to make SSL-encrypted HTTP connections and successfully publish data to the Personalization server.

Once the trust is enabled, you can change the URL of the run-time system that your using either in the Personalization Navigator Portlet or using pznload.sh command to use the https as protocol and correct port number.

If a Personalization server is configured to use a non-standard HTTPS port or context root, or if you see messages such as EJPVP20002E: The local publish service was not available when publishing from the authoring environment, the local publish servlet URL might be incorrect.
To specify the correct URL for the local publish server:

1. From the Portal Administration page, select Portlet Management > Portlets.
2. Locate the Personalization Navigator portlet in the list.
3. Click Configure portlet to configure the portlet.
4. Add a new portlet parameter whose name is pzn.publishServlet.url and specify the appropriate value.

Using pznload to publish rules

You can use a WebSphere Portal Personalization provided command-line executable to load exported Personalization artifacts into a local or remote server. So, you can script the delivery of rules and campaigns from staging to production, or the offline publishing between disconnected systems (such as when production servers are secured behind a firewall). You can use this function to quickly revert production servers to an earlier state.

Publishing via the command-line is a two step process. First, you export the personalization objects you want to transfer from the authoring environment to a remote system. When you select More Actions Export in the Personalization Navigator portlet, you are prompted for a location to save a nodes file. This file contains an XML representation of all the currently selected personalization objects. You can export entire folders.

After exporting and saving the desired objects, you use the pznload executable to send this data to the desired server. The pznload executables are located in the PortalServer_root/pzn/prereq.pzn/publish/ directory. On Windows, invoke the pznload.bat file. On UNIX, invoke the pznload.sh file. This program accepts a number of command line options and a set of nodes files to publish. Invoke pznload with the --help option to see a list of all options. The most important arguments are described below:

serverUrl
The URL of the remote publish servlet. If you do not specify a value the program will attempt to connect to a WebSphere Portal server running on the local machine.
targetWorkspace
The name of the workspace to publish to. The default workspace name on all IBM Content Manager run-time edition installations is RULESWORKSPACE.
targetPath
The location in the target workspace which will be the parent for the published nodes. The target path must exist prior to publishing. Example: If the Export function was used on the folder /Projects/HR Website, then the target path should be specified as /Projects so that the published resources are once again located in /Projects/HR Website.
username
A valid user on the target system with sufficient access rights.
password
The password for the user

Once a publish is started, you see status messages in the command console. If an error occurs, to get more information, turn on the Java Run time Environment tracing for WebSphere on the client system or examine the error and trace logs on the server system.

Publishing Personalization rules

Portal server supports the ability to author rules and campaigns on one system and publish them to other systems. System where rule is authored is called authoring system and system where rules are published is called run time system. When you author rules using Personalization Navigator + Personalization Editor portlets those rules get stored in the JCR database repository. At the time of executing these rules you need two things first is Java libraries to execute the rule as well as access to the JCR database where these rules are stored.

The process of publishing rules from authoring system to run-time system is a two step process, first you export the rules from authoring system into an xml file and then you import that xml file on the target system. Please note that the XML file that contains the personalization rules in not xmlaccess file instead it has different format. Take a look at the sample file on my machine


As you can see this file is not a regular .xml file instead it has some binary data. So it is not possible to create an xml file manually and import it on run-time system to create rules. Instead you will have to author the rules on one system and follow export + import system

Publishing rules


WebSphere Portal Personalization sends published objects across HTTP to a servlet which resides on each personalization server. This servlet can receive publishing data or initiate new publishing jobs. When a user begins a publishing job from the personalization authoring environment, the local servlet is provided with the set of information necessary to complete the job. The local servlet contacts the destination endpoint servlet (which could be the same servlet) and sends its data to it. The destination servlet reports success or failure.

To begin publishing personalization objects, you create an object in the authoring environment which describes the target endpoint.The server requires one field, which is the URL associated with the publish servlet for that endpoint. The publish server may also define which workspace will receive publishing data. Personalization operates in the default Content Manager run-time edition workspace after installation. If the target workspace field is empty, then the publish server uses the default workspace. (You need to set the workspace field if you are configuring scenario three described above.)

The last option is whether or not to delete remote objects that have been deleted on the local system. The default is Smart Delete, which simply removes items that are no longer present. If you do not have delete permission on the remote server you could select the Leave deleted resources on server option.

After you create a publish server, you can publish either the entire workspace or a set of objects within it. You specify either of these options by selecting the More Actions > Publish submenu


The Publish page displays what will be published. This page requires the user to choose a destination publish server and any necessary authentication information. If the remote system is secured and is not a member of the current server’s Single Sign-On domain you can enter a user name and password in the provided fields. The values for user and password are stored in the WebSphere Portal credential vault and are not accessible to any other user.Click Publish to launch the publish job.If the local system is able to locate and authenticate with the remote publish server, you are returned to the main navigator view, and you see the Personalization message EJPVP20001I at the top of the portlet. Then, the publish job runs as a background process on the local server. Click the View the details of this job link to open the publish status window to see information about the progress and success or failure of the publish job.

Administering Personalization

As per Adding Personalization feature to Admin install If you install portal using Admin install option, then it wont install Personalization portlets on your portal. And after installing portal you should execute this task to first install personalization portlets and add page to it.

./ConfigEngine.sh action-deploy-portlets-prereq.pzn -DPortalAdminPwd=wasadmin -DWasPassword=wasadmin

But on my portal even though i used admin install i can see that Personalization Navigator, Personalization Editor and Personalization Picker portlet was installed. Executing this task results in Personalization List portlet getting deployed. Also it creates 3 pages for personalization but it seems that there is problem with structure and the Personalization quick link does not show up.

The Portal Server provides two portlets that you can use to administer personalization rules, one is Personalization Navigator and other is Personalization Editor. These portlets allow you to view existing rules as well as create new rule, manage the ACL's for the personalization rule


The Personalization Navigator allows you to navigate, create, and delete Personalization objects entirely from a graphical user interface.

The Personalization Navigator consists of a tree directory view of the Personalization objects. Select a resource by clicking the box next to the object name. Click the plus or minus sign next to a folder to expand or collapse its contents.
The Personalization Editor allows you to edit object content or information.

Selecting a new element from the Personalization Navigator automatically brings you to the Personalization Editor. You enter data depending on the object chosen. You can also edit existing objects by highlighting the object in the Personalization Navigator, and clicking Edit in the Personalization Editor.


The Personalized List portlet allows a user to display personalized content without having to build a custom JSP portlet. Each portlet can display a list of resources and show details for each returned resource. Groups of related resources may be categorized for easy viewing. When a more detailed view of a piece of content is required, a custom detail JSP may be specified. Different instances of the portlet may be used across the Portal to quickly and easily deploy customized information to users.

PersonalizationService.properties

The PersonalizationService.properties file allows you to configure how the personalization rules engine works. It is located in
wp_profile\PortalServer\config\config\services

You can change PersonalizationService.properties to define things like how the Personalization related objects are cached, what happens if there is an error in executing the personalization rule,..

Important NoteThe PersonalizationService.properties file is not managed by the Deployment Manager so if you make any changes in it in the clustered environment then you should copy it manually to all the servers in the cluster


##################### Multiple lines of production #####################

# The workspace name for rules engine.
# (optional)
#
# Use this parameter if you have multiple lines of
# production sharing a JCR repository
# (shared JCR database domain)
#
# Each line of production may then have its own rules workspace
# each with different set of active rules, much like each line
# of production may have a different WPS configuration db domain.
#
rulesRepository.rulesWorkspace=RULESWORKSPACE

########################################################################

##################### Exception handling #####################

# Runtime exception handling method
#
# Options include:
#
# ignore
# Exceptions are ignored. Not supported in production environments.
# Ignoring exceptions will give no diagnostic information in case of error.
#
# logMessage_stdout
# logMessage_stderr
# logMessage_stdout_rethrow
# logMessage_stderr_rethrow
# logStackTrace_stdout
# logStackTrace_stderr
# logStackTrace_stdout_rethrow
# logStackTrace_stderr_rethrow
# logMessageAndStackTrace_stdout
# logMessageAndStackTrace_stderr
# logMessageAndStackTrace_stdout_rethrow
# logMessageAndStackTrace_stderr_rethrow
# rethrow_exception
#
rulesEngine.exceptionHandling=logStackTrace_stderr

# Specifies what occurs when an object is not found by Personalization.
# This may occur when Personalization cannot find the current user or
# when an expected application object does not exist on the session or
# request at the expected key.
#
# When false, a null user (or any other null object) is not treated
# as an error but is instead only printed to the logs as a warning.
# Personalization will continue as if the requested attribute
# of the null object is itself null.
#
# For instance, if no user object is found, a rule such as
# 'Show page or portlet when user.name is null'
# would return 'show' if rulesEngine.throwObjectNotFoundException
# is false. A null user is treated as if the user.name is null.
# On the other hand, if 'rulesEngine.throwObjectNotFoundException' is
# true, this same rule would throw an exception if the user object was
# not found.
#
# If this rule was used to determine the visibility of a page or portlet,
# the ultimate result would depend upon the value of
# 'rulesEngine.visibilityDefault', which is 'hide' by default.
#
rulesEngine.throwObjectNotFoundException=false

# Specifies a class which is called following processing of the
# rule but prior to returning the results.
#
#rulesEngine.defaultRuleExit=

########################################################################

##################### Cache control #####################

# Cache control settings
#
# cache.enabled
# Globally specifies whether cache is enabled or disabled.
#
# cache.jndiName
# Globally specifies a cache to use.
#
# cache.maxEnumSize
# Globally specifies the maximum number of entries in each
# cached enumeration. Enumerations which exceed this number
# will not be cached. -1 indicates no limit.
#
# Optionally, the above parameters may be configured for each
# resource collection.
#
# cache.timeout
# Globally specifies the cache timeout.
#
# cache.priority
# Globally specifies the cache priority.
#
rulesEngine.cache.enabled=true
rulesEngine.cache.jndiName=services/cache/pzn/general
rulesEngine.cache.maxEnumSize=-1
rulesEngine.cache.timeout=300
rulesEngine.cache.priority=1

rulesEngine.cache.enabled.ibmpznnt:rule=true
rulesEngine.cache.jndiName.ibmpznnt:rule=services/cache/pzn/rules
rulesEngine.cache.maxEnumSize.ibmpznnt:rule=-1
rulesEngine.cache.timeout.ibmpznnt:rule=300
rulesEngine.cache.priority.ibmpznnt:rule=1

rulesEngine.cache.enabled.ibmpznnt:campaign=true
rulesEngine.cache.jndiName.ibmpznnt:campaign=services/cache/pzn/campaigns
rulesEngine.cache.maxEnumSize.ibmpznnt:campaign=-1
rulesEngine.cache.timeout.ibmpznnt:campaign=300
rulesEngine.cache.priority.ibmpznnt:campaign=1

rulesEngine.cache.enabled.ibmpznnt:ruleMappings=true
rulesEngine.cache.jndiName.ibmpznnt:ruleMappings=services/cache/pzn/ruleMappings
rulesEngine.cache.maxEnumSize.ibmpznnt:ruleMappings=-1
rulesEngine.cache.timeout.ibmpznnt:ruleMappings=300
rulesEngine.cache.priority.ibmpznnt:ruleMappings=1

rulesEngine.cache.enabled.ibmpznnt:resourceCollection=true
rulesEngine.cache.jndiName.ibmpznnt:resourceCollection=services/cache/pzn/resourceCollections
rulesEngine.cache.maxEnumSize.ibmpznnt:resourceCollection=-1
rulesEngine.cache.timeout.ibmpznnt:resourceCollection=300
rulesEngine.cache.priority.ibmpznnt:resourceCollection=1

rulesEngine.cache.enabled.ibmpznnt:applicationObject=true
rulesEngine.cache.jndiName.ibmpznnt:applicationObject=services/cache/pzn/applicationObjects
rulesEngine.cache.maxEnumSize.ibmpznnt:applicationObject=-1
rulesEngine.cache.timeout.ibmpznnt:applicationObject=300
rulesEngine.cache.priority.ibmpznnt:applicationObject=1

rulesEngine.cache.enabled.ibmpznnt:uuidPathConversion=true
rulesEngine.cache.jndiName.ibmpznnt:uuidPathConversion=services/cache/pzn/uuidPathConversions
rulesEngine.cache.maxEnumSize.ibmpznnt:uuidPathConversion=-1
rulesEngine.cache.timeout.ibmpznnt:uuidPathConversion=300
rulesEngine.cache.priority.ibmpznnt:uuidPathConversion=1

rulesEngine.cache.enabled.ibmpznnt:jcrNodeType=true
rulesEngine.cache.jndiName.ibmpznnt:jcrNodeType=services/cache/pzn/jcrNodeTypes
rulesEngine.cache.maxEnumSize.ibmpznnt:jcrNodeType=-1
rulesEngine.cache.timeout.ibmpznnt:jcrNodeType=300
rulesEngine.cache.priority.ibmpznnt:jcrNodeType=1

#rulesEngine.cache.enabled.=true
#rulesEngine.cache.jndiName.=services/cache/distributedmap
#rulesEngine.cache.maxEnumSize.=25

#
# Caching is enabled for the default Portal Document Resource Collection
# (/.personalization/collections/ibmpzn:dmDocumentCollection)
# the Web Content collection
# (/.personalization/collections/ibmpzn:wcmWebContentCollection)
# and disabled for the Portal User collection
# (/.personalization/collections/ibmpzn:wpsUser)
#
rulesEngine.cache.enabled./.personalization/collections/ibmpzn\:dmDocumentCollection=true
rulesEngine.cache.enabled./.personalization/collections/ibmpzn\:wcmWebContentCollection=true
rulesEngine.cache.enabled./.personalization/collections/ibmpzn\:wpsUser=false

########################################################################

##################### Scheduler / Rules events /E-mail campaigns #######

# Task configuration for rule events
# interval
# Specifies the amount of time (in seconds) between checking
# the repository for updates to rule events
# Default is 3600 seconds (1 hour)
#
# If this value is very short, it is possible that the scheduler will
# attempt to run before the server is finished starting. In this case,
# an email campaign may be unable to get its body content. This value
# should be sufficiently long to allow for the server start to complete.
#
scheduler.interval=3600
scheduler.workManager=wm/wpspznruleevents

# Configuration for Session for e-mail rules
# jndiName
# Specifies a jndi lookup name for the Mail Session.
# Configure your session using the WebSphere Application
# Server administrative console
#
email.session.jndiName=mail/personalizationMailSession

########################################################################

##################### Id Translator #####################

# Optional configuration for
# com.ibm.websphere.personalization.security.RegularExpressionSecurityTranslator
# The default pattern of
# ^.*(?:uid|UID|cn|CN)=([^,]+).*$
# and replacement pattern of
# $1
# will turn a user id such as
# uid=wpsadmin,o=default organization
# or
# cn=wpsadmin,o=default organization
# into simply
# wpsadmin
#
translator.pattern=^(?:uid|UID|cn|CN)=([^,]+).*$
translator.replacementPattern=$1

# Optional configuration for the port of the content
# server which serves the body of the e-mail messages.
email.contentServer.port=10040

########################################################################

##################### Portal User Collection #####################

# Use this configuration property to control which WMM properties show
# in the Personalization rule editor. wmm.property.hide will only
# hide those properties which are introspected from the WMM configuration.
wmm.property.hide=mobile,pager,roomNumber,secretary,carLicense,telephoneNumber,facsimileTelephoneNumber,seeAlso,userPassword,ibm-firstWorkDayOfWeek,ibm-alternativeCalendar,ibm-preferredCalendar,ibm-firstDayOfWeek,ibm-primaryEmail,ibm-otherEmail,ibm-generationQualifier,labeledURI,createTimestamp,modifyTimestamp,ibm-middleName,ibm-timeZone,initials,jpegPhoto,WCM\:USERDATA,groups

##################### Web Content Collection #####################

# Use this configuration property to control which WCM authoring
# templates show in the Personalization rule editor.
# The default is to show all authoring templates which have
# components which can be used in rules.
wcm.authoringTemplate.hide=
#Use this property to bypass the return of web content links in results
#rulesEngine.bypassWebContentLink=true

##################### Attribute Based Administration ###################

# Use this property to configure the root directory for Portal
# administration visibility rules (ROOT=/)
pickerRoot.com.ibm.portal.navigation=ROOT
# Default behavior if an error prevents a visibility rule from running (show/hide)
rulesEngine.visibilityDefault=hide
# Use this property to determine whether or not to cache the results of rules
# used in attribute based admin.
rulesEngine.attributeBasedAdmin.enableCaching=true
# Use this property to determine whether attribute based admin rules are evaluated
# in determining if navigational labels have children available.
rulesEngine.attributeBasedAdmin.verifyHasChildren=true

########################################################################

# Use this property to allow Personalization to edit rules larger than 32k in size.
# Rules edited while this is enabled cannot be read on systems older than Portal
# 6.1 without PK65714 installed.
rulesRepository.enableLargeRules=false

########################################################################


##################### Internal Use Only #####################

wcm.authoringTemplate.componentTypes.show=ibmcontentwcm:dateElement,ibmcontentwcm:shortTextElement,ibmcontentwcm:textElement,ibmcontentwcm:numericElement,ibmcontentwcm:optionSelectionElement
cm.property.hide=jcr:baseVersion,jcr:versionHistory,jcr:nodeType,jcr:isCheckedOut,ibmcontentwcm:name,ibmcontentwcm:classification
cm.property.hide.lotus\:collaborativeDocument=icm:categories,icm:expirationDate,icm:authors,icm:owners
cm.property.hide.clb\:clbDocument=icm:expirationDate,icm:authors,icm:owners
rulesEngine.publish.publishDocumentLibraries=false
pdm.documentHelper.class=com.ibm.websphere.personalization.pdm.Pdm60DocumentHelper