WebSphere Application Server Logs

WebSphere APplication server generates logs of three types. You can configure them using WAS Admin Console by going to Troubleshooting -> Logging and Tracing -> <servername>


  • JVM Logs:The JVM logs are created by redirecting the System.out and System.err streams of the JVM to independent log files. The System.out log is used to monitor the health of the running application server. The System.err log contains exception stack trace information that is used to perform problem analysis. One set of JVM logs exists for each application server and all of its applications. JVM logs are also created for the deployment manager and each node manager

  • Process Logs: The process logs are created by redirecting the standard out and standard error streams of a process to independent log files. Native code writes to the process logs. These logs can also contain information that relates to problems in native code or diagnostic information written by the JVM. One set of process logs is created for each application server and all of its applications. Process logs are also created for the deployment manager and each node manager.

  • IBM Service Logs:The IBM service log contains both the application server messages that are written to the System.out stream and special messages that contain extended service information that you can use to analyze problems. One service log exists for all Java virtual machines (JVMs) on a node, including all application servers and their node agent, if present. A separate activity log is created for a deployment manager in its own logs directory. The IBM Service log is maintained in a binary format. Use the Log Analyzer or Showlog tool to view the IBM service log.

IBM Service log

The IBM Service log contains both the applications erver messages that are written to System.out stream and special messages that contain extended service information that can be used to analyze the problem. The IBM Service log is maintained in a binary format, so in order to view the activity.log file you will have to use either the command line based showlog tool that is shipped with WebSphere Application Server or use GUI based Log Analyzer tool that is shipped with WebSphere Application Server Toolkit.

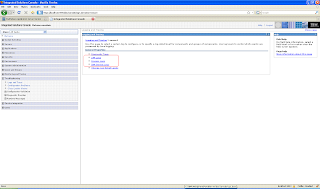
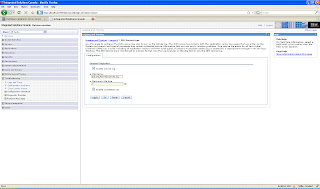
One service log exists for all Java virtual machines (JVMs) on a node, including all application servers and their node agent, if present. A separate activity log is created for a deployment manager in its own logs directory.The activity log, by default, is a file named activity.log in the profile_home/logs directory. You can edit the settings for the activity log by selecting Troubleshooting > Logs and Trace > server_name > IBM Service Logs in the administrative console.


These are the settings that should be configured:

  • Enable service log: If selected, enables the service log.

  • File Name: Specifies the name of the service log.

  • Maximum File Size: Specifies the number of megabytes to which the file can grow. When the file reaches this size, it begins replacing the oldest data with the newest data

  • Enable Correlation ID: Specifies whether or not a correlation ID should be generated and included in message events.

Configuring FFDC Tool

The FFDC tool does not affect performance of the server and should not be disabled. But the FFDC tool does create one incident file for each of the incident and you can configure when these incident files should be purged.

There are three property files which control the behavior of the ffdc filter. The files which are used are based upon the state of the server:


  1. ffdcStart.properties: used during start of the server

  2. ffdcRun.properties: used after the server is ready

  3. ffdcStop.properties: used while the server is in the process of stopping


The only file that you should modify is the ffdcRun.properties file. You can change the value of ExceptionFileMaximumAge property. This property specifies the number of days that an FFDC log remains in the <profileroot>/logs/ffdc directory before being deleted. As part of your diagnostic data collection plan, you might want to modify the ExceptionFileMaximumAge property to ensure that the FFDC files remain on your system for a certain time period. You should not modify any other properties unless you are asked to do so by the support team.

Understanding FFDC log files

When your running your websphere application server you will see this type of messages in your SystemOut.log file or in the console of your RAD saying that FFDC incident stream file is opened.


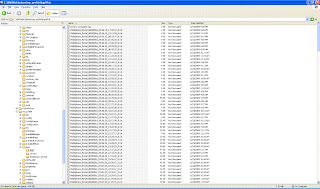
[6/24/09 17:21:07:125 PDT] 0000000a ServiceLogger I com.ibm.ws.ffdc.IncidentStreamImpl initialize FFDC0009I: FFDC opened incident stream file C:\IBM\WebSphere\wp_profile\logs\ffdc\WebSphere_Portal_0000000a_09.06.24_17.21.07_0.txt
[6/24/09 17:21:07:140 PDT] 0000000a ServiceLogger I com.ibm.ws.ffdc.IncidentStreamImpl resetIncidentStream FFDC0010I: FFDC closed incident stream file C:\IBM\WebSphere\wp_profile\logs\ffdc\WebSphere_Portal_0000000a_09.06.24_17.21.07_0.txt


This line indicates that some abnormal condition happened and a FFDC log has been created for that error. You can safely ignore this message. There are two artifacts which are produced by FFDC, the information can be located in the <profileroot>/logs/FFDC directory:


  • Exception Logs:<ServerName>_Exception.log
  • Incident Stream:<ServerName>_<threadid>_<timeStamp>_<SequenceNumber>.txt


The first file <ServerName>_Exception.log has one entry each for all the FFDC incidents that happened since the server started. So most of the data in this file is old. This is how a sample entry in <ServerName>_Exception.log file looks like


Index Count Time of last Occurrence Exception SourceId ProbeId
------+------+---------------------------+--------------------------
1 1 6/19/09 17:26:15:686 PDT java.util.zip.ZipException com.ibm.ws.classloader.ClassLoaderUtils.addDependents 238
------+------+---------------------------+--------------------------


The incident stream contains more details about exceptions which have been encountered during the running of the server. One indecent file would be created for every indecent with detailed thread dump of the thread in which exception occurred. This is how a sample incident file looks like

------Start of DE processing------ = [6/26/09 9:03:07:161 PDT] , key = java.util.zip.ZipException com.ibm.ws.classloader.ClassLoaderUtils.addDependents 238
Exception = java.util.zip.ZipException
Source = com.ibm.ws.classloader.ClassLoaderUtils.addDependents
probeid = 238
Stack Dump = java.util.zip.ZipException: Bad file descriptor C:\IBM\WebSphere\PortalServer\lwp04.infra\sync.infra\syncmlbase\shared\app\lotusworkplacelib\eclipse-runtime.jar
at java.util.zip.ZipFile.open(Native Method)
at java.util.zip.ZipFile.(ZipFile.java:238)
at java.util.jar.JarFile.(JarFile.java:169)
at java.util.jar.JarFile.(JarFile.java:107)
at com.ibm.ws.classloader.ClassLoaderUtils.addDependents(ClassLoaderUtils.java:99)
at com.ibm.ws.classloader.ClassLoaderUtils.addDependents(ClassLoaderUtils.java:146)
at com.ibm.ws.classloader.ClassLoaderUtils.addDependentJars(ClassLoaderUtils.java:60)
at com.ibm.ws.runtime.component.ApplicationServerImpl.initializeClassLoader(ApplicationServerImpl.java:278)
at com.ibm.ws.runtime.component.ApplicationServerImpl.initialize(ApplicationServerImpl.java:136)
at com.ibm.ws.runtime.component.ContainerImpl.initializeComponent(ContainerImpl.java:1338)
at com.ibm.ws.runtime.component.ContainerImpl.initializeComponents(ContainerImpl.java:1171)
at com.ibm.ws.runtime.component.ServerImpl.initialize(ServerImpl.java:356)
at com.ibm.ws.runtime.WsServerImpl.bootServerContainer(WsServerImpl.java:178)
at com.ibm.ws.runtime.WsServerImpl.start(WsServerImpl.java:140)
at com.ibm.ws.runtime.WsServerImpl.main(WsServerImpl.java:461)
at com.ibm.ws.runtime.WsServer.main(WsServer.java:59)
at sun.reflect.NativeMethodAccessorImpl.invoke0(Native Method)
at sun.reflect.NativeMethodAccessorImpl.invoke(NativeMethodAccessorImpl.java:79)
at sun.reflect.DelegatingMethodAccessorImpl.invoke(DelegatingMethodAccessorImpl.java:43)
at java.lang.reflect.Method.invoke(Method.java:618)
at com.ibm.wsspi.bootstrap.WSLauncher.launchMain(WSLauncher.java:183)
at com.ibm.wsspi.bootstrap.WSLauncher.main(WSLauncher.java:90)
at com.ibm.wsspi.bootstrap.WSLauncher.run(WSLauncher.java:72)
at org.eclipse.core.internal.runtime.PlatformActivator$1.run(PlatformActivator.java:78)
at org.eclipse.core.runtime.internal.adaptor.EclipseAppLauncher.runApplication(EclipseAppLauncher.java:92)
at org.eclipse.core.runtime.internal.adaptor.EclipseAppLauncher.start(EclipseAppLauncher.java:68)
at org.eclipse.core.runtime.adaptor.EclipseStarter.run(EclipseStarter.java:400)
at org.eclipse.core.runtime.adaptor.EclipseStarter.run(EclipseStarter.java:177)
at sun.reflect.NativeMethodAccessorImpl.invoke0(Native Method)
at sun.reflect.NativeMethodAccessorImpl.invoke(NativeMethodAccessorImpl.java:79)
at sun.reflect.DelegatingMethodAccessorImpl.invoke(DelegatingMethodAccessorImpl.java:43)
at java.lang.reflect.Method.invoke(Method.java:618)
at org.eclipse.core.launcher.Main.invokeFramework(Main.java:336)
at org.eclipse.core.launcher.Main.basicRun(Main.java:280)
at org.eclipse.core.launcher.Main.run(Main.java:977)
at com.ibm.wsspi.bootstrap.WSPreLauncher.launchEclipse(WSPreLauncher.java:336)
at com.ibm.wsspi.bootstrap.WSPreLauncher.main(WSPreLauncher.java:91)

Dump of callerThis =
null

Exception = java.util.zip.ZipException
Source = com.ibm.ws.classloader.ClassLoaderUtils.addDependents
probeid = 238
Dump of callerThis =
null

You can relate the incident file with the exception.log file by taking the probeid from the incident file and searching for it in the exception.log file. You will notice that timestamps also match.

Use First Failure Data Capture (FFDC) Tool

WebSphere Application Server includes a feature called First Failure data capture (FFDC). This tool runs in the background and collects events and errors that occur during WebSphere Application server runtime and logs that information into profiles\<servername>\logs\ffdc folder

The FFDC logs are mostly not going to be useful to the administrator but they are useful for the websphere application server support team when you open a PMR.

Test 000-253: IBM WebSphere Application Server Network Deployment V6.1, Core Administration

Architecture (17%)


  1. Discuss the relationships between IBM WebSphere Application Server, V6.1 and the application components (e.g., browser, HTTP server, plug-in, firewall, database servers, WebSphere MQ, load balancing, and ip spraying.)

  2. Evaluate the design considerations of IBM WebSphere Application Server, V6.1 packaging and installation in an enterprise environment (e.g., LDAP, database servers, Service Integration Bus Technology (SIB), etc.)

  3. Articulate the various components of IBM WebSphere Application Server Network Deployment, V6.1 runtime architecture.

  4. Describe workload management and failover strategies using IBM WebSphere Application Server, V6.1

  5. Articulate the usage of Session Initiation Protocol (SIP) in WebSphere.

  6. Articulate support for portlet containers.

  7. Describe WebSphere dynamic caching features.


Installation/Configuration of Application Server (13%)


  1. Identify installation options and determine the desired configuration (e.g., silent install, required/desired plug-ins etc.)

  2. Install WebSphere Application Server and verify the installation (e.g., IVT, verification using sample (snoop and/or hitcount.))

  3. Create profiles.

  4. Utilize installation factory to create custom install packages.

  5. Troubleshoot the installation (e.g., identify and analyze log files.)


Application Assembly and Deployment (17%)


  1. Describe the name service management of WebSphere Application Server (JNDI).

  2. Package J2EE applications, including Enhanced Ear Files using the Application Server Toolkit (AST)

  3. Define and map security roles (e.g., J2EE security).

  4. Define JDBC providers and data sources (e.g., resource scoping).

  5. Configure J2C resource adapters, connection factories (resource scoping) and Message Driven Bean Activation Spec.

  6. Configure WebSphere JMS providers.

  7. Automate deployment tasks with scripting.


WebSphere Security (11%)


  1. Implement security policies (e.g., authentication and authorization (using different security registries), etc.)

  2. Protect WebSphere resources.

  3. Define and implement WebSphere administrative security roles

  4. Configure WebSphere plug-in to use SSL.

  5. Describe Federated Repositories using Virtual Member Manager (VMM).

  6. Implement federated repositories.


Workload Management, Scalability, Failover (11%)


  1. Federate nodes (including custom profiles)

  2. Create clusters and cluster members.

  3. Evaluate session state failover options (memory-to-memory, database persistence).

  4. Create and configure Data Replication Service (DRS) replication domains.

  5. Manage Web Servers in a managed and unmanaged node.


Maintenance and Performance Tuning (18%)


  1. Manage application configurations (e.g., application bindings, tune HTTP session configuration parameters such as timeout value, persistence, etc.).

  2. Perform WebSphere backup, restore and configuration tasks.

  3. Monitor size of log files and backup/purge as needed.

  4. Manage the plug-in configuration file (e.g., regenerate, edit, propagate, etc.).

  5. Tune performance of WebSphere Application Server (e.g., configure caching, queuing and thread pooling parameters, tune JVM heap size, etc.).

  6. Use Integrated Tivoli Performance Viewer gather information about resources

  7. Use Integrated Tivoli performance runtime advisor to analyze results

  8. Tune data source configuration (e.g., connection pooling, timeouts, etc.)

  9. Configure class loader parameters.


Problem Determination (13%)


  1. Configure, review and analyze logs (e.g., Web server, IBM WebSphere Application Server)

  2. Use Log Analyzer from the Application Server Toolkit to analyze logs.

  3. Use trace facility (e.g., enabling, selecting components, and log configuration).

  4. Use First Failure Data Capture (FFDC) Tool.

  5. Use the JNDI dumpNameSpace utility.

  6. Perform JVM troubleshooting tasks (e.g., thread dump, JVM core dump, and heap dump).

  7. Use IBM Support Assistant.

WebSphere Application Server System Administration options

There are two differences in how WAS handles administration depending on the environment you have set up.

Stand-alone server environment


Stand-alone Server environment refers to a single stand-alone server that is not managed as part of cell. With Base and express package, this is your only option. You can also create stand-alone server with Network Deployment package<

In this case each managed process has an administrative service that interacts with administration clients (Browser based or wsadmin). In this case both the administration client and administration service runs on the same application server. The configuration repository consist of one set of configuration files managed by the administrative service. System management is simplified in the sense that the changes made by the administrator are applied directly to the configuration files used by the server.


Distributed Server environment


Distributed Server environment refers to the situtation where you have multiple servers managed from a single deployment manager in the cell. In this case the application servers, node agents, deployment manager are called as managed processes. This option is only valid with the Network Deployment Package

In distributed server environment, administration tasks and configuration files are distributed amon the nodes, reducing the reliance on a central repository for administratioin server for basic functions and bring-up. The administrative services and the administrative console are hosted on the deployment manager. Managed applications are installed on nodes. Each node has a node agent that interacts with the deployment manager to maintain and manage the processes on that node.

Multiple sets of configuration files exists. The master configuration is maintained on the deployment manager node and pushed out, synchronized to the nodes. Each managed process starts with its own configuration file.

Configuration should always be done at the deployment manager and synchronized out to the nodes. Although therotically possible to configure nodes locally using wsadmin, it is not recommended and any changes made will be overwritten at the next synchronization.

WebSphere Application Server pacakging options

WebSphere Application Server - Express 6.0


The Express package is geared for those who need to get started quickly with e-business. It is for mid-sized business or departments of large corporations. It contains full J2EE 1.4 support(Including JCA, EJB) but is limited to single-server environment

The express package is bundled with an application development tool. The Express edition includes the Rational Web Developer application development tool. It provides ability to develop web applications and includes support for most J2EE 1.4 features with exception of EJB and J2EE Connector architecture (JCA) development environments.

WebSphere Application Server V6.1 (Base package)


This package is functionally equivalent to that shipped with Express but it differs slightly in the packaging and licensing. It includes two tools for application development and assembly.

  • The Application Server toolkit: Which includes full set of development tool. It supports development, assembly and deployment of J2EE 1.4 applications. In addition the toolkit provides tools for development, assembly and deployment for JSR 116 SIP and JSR 168 portlet applications.

  • This package also includes trial version of Rational Application Developer. Which supports the development, assembly and deployment of J2EE 1.4 applications.


WebSphere Application Server Network Deployment V6


It extends the base package to include clustering capabilities, Edge Components and high availability for distributed configuration.

WebSphere Application Server 6.1 for Z/OS


This package is full-function version of the Network deployment product for Z/OS

Good news

Today i cleared Test 955 IBM WebSphere Portal 6.1 Deployment and Administration test with 90% marks. I had to study for this test for close to 1 year but looking back it was worth it :)

Configuring trust for the Sametime Contact List portlet

To use the Sametime Contact List portlet, you configure the IBM® Lotus® Sametime® server so that it will trust the Lotus Sametime server application running on your IBM WebSphere® Portal server, as well as trust any additional Domino and Extended Product servers within your site.
Note: If your portal environment does not use the LTPA token (UseLTPAToken is set to false in your CSEnvironment.properties file), WebSphere Portal requires this trust configuration in order to build the credentials for people awareness.

Your portal does not use the LTPA token if the Lotus Sametime server is set to authenticate with a native Lotus Domino Directory; instead, the Lotus Sametime server uses a Sametime token.

You can configure trust in one of two ways, depending on the maturity of your portal environment. In a test or development environment, you can set the Lotus Sametime server to accept the IP addresses of all other servers as trusted. Later, when you increase security, you may want to configure a restricted list of trusted server IP addresses.

Perform the following steps:

1. Determine whether you want to trust all servers, or set up a list of servers to which trust is restricted.
2. To trust all servers (appropriate in a test environment):
1. Open a text editor on the Sametime server.
2. Open the Sametime.ini file.
3. Add the following line to the Debug section:

[Debug]
VPS_BYPASS_TRUSTED_IPS=1

4. Save and close the Sametime.ini file.
5. Restart the Sametime server.
3. To set up a list of restricted servers (appropriate in a production environment):
1. Determine the IP addresses of all servers in your portal environment that will connect to the Lotus Sametime server, beginning with the primary portal server, and including any other portal or Lotus Sametime servers.
Restriction: You must use actual IP addresses, not server hostnames.
2. On the primary Lotus Sametime server, use a Lotus Notes client to open the STconfig.nsf database.
3. Open the By form view.
4. Edit the Community Connectivity document.
5. In the Community Trusted IPS field, enter all trusted IP addresses, separated by either a comma (,) or semicolon (;).
6. Save the document, and restart the primary Lotus Sametime server.

For more information on the token setting in the CSEnvironment.properties file, see Setting Lotus Sametime to use a Lotus Sametime token for user login.
Security Considerations for WSRP Service

When you use WSRP with your portal, you can configure security and provide authentication by using different authentication mechanisms.
You can choose between using Web services security (WS-Security) or Secure Socket Layer (SSL):

  • Authentication of the end user by using WS-Security (Web services security). For example, this can be by using Lightweight Third-Party Authentication (LTPA) token forwarding. In this case the Consumer portal passes requests from individual users on to the Producer portal under separate user IDs.
    Note: With the portal you can use all security tokens that IBM® WebSphere® Application Server supports. For most tokens the Consumer and Producer portals need to share the same user registry, for example, LTPA.

  • Authentication of the Consumer portal by using Secure Socket Layer Client Certificate Authentication: In this case the Consumer portal channels all requests by its users under the same preset shared user ID and passes them on to the Producer portal. For this option the Consumer and Producer portal can have shared or separate user registries.


When you configure security between your WSRP portals by one of these options, you also need to configure Portal Access Control and assign access rights for the Consumer portal users on the Producer portal. If you do not use either of these two authentication methods, the Producer portal assumes the anonymous user.
Assigning access rights: The Producer needs to assign access rights on the Producer portal based on the authentication information as follows:


  • If you use WS-Security, assign access rights on the Producer portal to the actual Consumer portal users.

  • If you use SSL client certificate authentication, assign access rights to the shared user ID that the Consumer uses and that is specified in the client certificate.

  • If you use none of these two authentication methods, assign access rights to the anonymous user. This is necessary because the Producer portal assumes the anonymous user, if no authentication is performed.

Mapping attributes between LDAP and WebSPhere Portal

Perform the following steps to map attributes between WebSphere Portal and your LDAP server; if you have multiple LDAP servers, you will need to perform these steps for each LDAP server:


  • Run one of the following tasks to check that all defined attributes are available in the configured LDAP user registry

    • Stand alone: ConfigEngine.sh wp-validate-standalone-ldap-attribute-config

    • Federated: ConfigEngine.sh wp-validate-federated-ldap-attribute-config


  • Open the config trace file to review the following output for the PersonAccount and Group entity type:
    The following attributes are defined in WebSphere Portal but not in the LDAP server
    This list contains all attributes that are defined in WebSphere Portal but not available in the LDAP. Flag attributes that you do not plan to use in WebSphere Portal as unsupported. Map the attributes that you plan to use to the attributes that exist in the LDAP; you must also map the uid, cn, firstName, sn, preferredLanguage, and ibm-primaryEmail attributes if they are contained in the list..
    The following attributes are flagged as required in the LDAP server but not in WebSphere Portal
    This list contains all attributes that are defined as "MUST" in the LDAP server but not as required in WebSphere Portal. You should flag these attributes as required within WebSphere Portal; see the step below about flagging an attribute as either unsupported or required.
    The following attributes have a different type in WebSphere Portal and in the LDAP server
    This list contains all attributes that WebSphere Portal might ignore because the data type within WebSphere Portal and within the LDAP server do not match.

  • Enter a value for one of the following sets of parameters in the wkplc.properties file to correct any issues found in the config trace file:
    The following parameters are found under the LDAP attribute configuration heading:

    * standalone.ldap.id
    * standalone.ldap.attributes.nonSupported
    * standalone.ldap.attributes.nonSupported.delete
    * standalone.ldap.attributes.mapping.ldapName
    * standalone.ldap.attributes.mapping.portalName
    * standalone.ldap.attributes.mapping.entityTypes

  • Run one of the following tasks to update the LDAP user registry configuration with the list of unsupported attributes and the proper mapping between WebSphere Portal and the LDAP user registry:

    • Standalone :ConfigEngine.sh wp-update-standalone-ldap-attribute-config

    • Federated: ConfigEngine.sh wp-update-federated-ldap-attribute-config


Notes on SSO between WebSphere and domino


  • Install and configure all Lotus Domino servers, and then enable SSO for them all. For example, install and configure Lotus Domino messaging or applications servers, and servers for IBM Lotus Sametime, before you enable SSO.

  • l servers participating in SSO must be in the same Internet domain.

  • To enable SSO, you must enable the IBM Lightweight Third-Party Authentication (LTPA) capabilities included in both IBM WebSphere Application Server and Lotus Domino. The WebSphere LTPA token generated by WebSphere Application Server is imported into Lotus Domino, and this token can be used for all servers within the Lotus Domino domain. Verify that automatic LTPA key generation is disabled on each node of the SSO domain.

  • To enable SSO across multiple Lotus Domino domains, import the same WebSphere
    LTPA token into those Lotus Domino domains.

  • One Web SSO configuration document per Lotus Domino domain can be replicated to all the other Lotus Domino servers in that domain, but enabling multi-server authentication must be done individually for every server in a Lotus Domino domain.

  • Additional configuration may be needed if WebSphere Portal is configured for multiple realms.

Starting and stopping portal using ConfigEngine commands

The ConfigEngine task provides following two tasks that can be used to start or stop the portal server. Using ConfigEngine.sh for stopping portal server is specially useful if the portal admin user id and password is set in wkplc.properties and you dont want to pass that information on the command line.


  • ./ConfigEngine.sh stop-portal-server This configuration task can be used to stop the portal server

  • ./ConfigEngine.sh start-portal-server This configuration task can be used to start the portal server

Portal level PMI

In addition to the portlet level PMI data, the WPS 6.1 server can also collect some portal level data. You can enable it by checking wpsModules check box. When i enabled it i can see quite a lot of portal level matrix such as % time spent in portlet code or in aggregation code. But the data is not getting updated. NOt sure if i have to follow some additional steps.

Portlet PMI

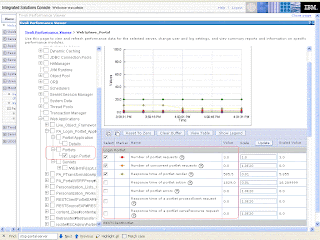
Starting from WAS 6.1, The Tivoli performance viewer lets you capture the Performance monitoring data for the portlet. Take a look at this screen, You can enable the PMI for particular portlet by selecting that portlet under Performance Module -> Web Applications when you expand the web application if it has portlet then it will display additional check boxes for capturing PMI for that portlet or portlet application. Once you enable it, you can see the PMI data that TPV is capturing for portlet


  • Response time of portlet render: REsponse time for the portlets render method that means time spent in either of do***() method

  • Response time of portlet action: REsponse time for the portlets processAction() method

  • Response time of a portlet processEvent request: REsponse time for the portlets processEvent() method

  • Response time of a portlet serveResource request: REsponse time for the portlets serveResource() method.

Member Fixer Tool

Use the member fixer task to check whether any users or groups referenced in IBM Lotus Web Content Management items have been renamed or deleted and fix these references.

The member fixer task's function is to check all of the items in a specified library for references to users and groups that no longer exist in the current user repository. In report mode, it will report all the references to members. In fix mode, these references can be fixed, either by replacing them with references to members that exist, or by removing the references. The fix parameter determines whether the member fixer task runs in report or fix mode.

References to members in library items contain the distinguished name of the member as well as a unique ID for the member. This unique ID is an internal id that is unique over time, and is different to the distinguished name. This means if a member is deleted and another member is created with the same distinguished name, the two members will have different unique IDs. The mismatched_id parameter can be used to update or remove references from web content items to users with these unique IDs.

When a member that has been given permissions on a library is deleted, the member permissions are entirely removed from the library, so that any inherited permissions for items in the library will also be removed. Therefore, the member fixer task can not be used to update these permissions to a different member. However, when an LDAP transfer is carried out, the member permissions on the library are maintained. So, the member fixer task can be run after an LDAP transfer to update or remove these permissions

You can run the Member fixer tool using either of two options

  • You can run it as command line tool using this configuration task

    ConfigEngine.bat run-wcm-admin-task-member-fixer -DPortalAdminId=username -DPortalAdminPwd=password -Dlibrary=MyLibrary -Dfix=true


  • You can execute the member fixer tool using the HTTP request method by opening this URL in the browser

    http://hostname.yourco.com:port_number/wps/wcm/connect
    ?MOD=MemberFixer&library=libraryname


The Member fixer tool can work in both report and fix mode. In report mode it will report the inconsistencies by writing report in SystemOut.log. If you add fix parameter then it will make the changes for fixing inconsistencies

Steps for migrating WCM data from 6.0 to 6.1

To migrate from IBM WebSphere Portal V6.0 or later, you must connect to a copy of the earlier portal's JCR database domain before running the migration tasks.

Important: If the new portal installation uses the same DBMS as the earlier portal, you must use the same database driver to connect to the copy of the earlier portal's JCR database domain. For example, if you configured the new portal's release domain to use DB2 with a DB2 Type 4 driver, and the earlier portal's JCR database domain also uses DB2, you must use a DB2 Type 4 driver to connect to the copy of the earlier portal's JCR database domain. If the new portal uses Oracle for the release domain and the earlier portal's JCR database domain uses a different DBMS such as DB2, you do not need to use the same database driver to connect to the copy of the earlier portal's JCR domain.

Follow these steps for migrating data

  1. Create a separate copy of the earlier WebSphere Portal JCR domain.

  2. On the new portal, locate and update the properties files listed below to reflect a connection to the JCR domain copy that you created in the previous step:
    * wp_profile_root/ConfigEngine/properties/wkplc.properties
    * wp_profile_root/ConfigEngine/properties/wkplc_comp.properties
    * wp_profile_root/ConfigEngine/properties/wkplc_dbtype.properties
    Note: The value of the parameter jcr.DbSchema in the wkplc_comp.properties file must be specified in uppercase (for example, jcr.DbSchema=JCR).

  3. Change to the wp_profile_root/ConfigEngine directory, and then enter the following commands to validate the configuration properties:

    ConfigEngine.bat validate-database-driver -DTransferDomainList=jcr
    ConfigEngine.bat validate-database-connection -DTransferDomainList=jcr

  4. Stop the WebSphere_Portal server.

  5. Connect WebSphere Portal Version 6.1 to the copy of the earlier JCR domain:
    ConfigEngine.bat connect-database-jcr-migration
    Note: The portal-post-upgrade task uses database catalog functions during execution. These catalog functions need to be correctly bound to the database for the portal-post-upgrade task to work. Refer to the documentation for your DBMS to determine how to do this.

  6. If you used IBM Lotus Web Content Management in the earlier portal, delete any V6.0.1.x syndicators or subscribers that were copied with the JCR database domain. See Setting up a syndication relationship.

  7. If you are migrating Web Content Management you must also run the following task:
    ConfigEngine.bat create-wcm-persistence-tables

  8. Verify that the new portal server starts.

Remote portlet support for portlet wires

The portal also enables the creation of wires between remote portlets that use the Web Services for Remote Portlets (WSRP) v2.0 protocol for event transfer. Remote portlets that have been integrated into the portal and placed on portal pages can be wired, even if they were consumed from different Producers. Remote portlets can also be wired to local standard portlets.

Payload data for remote events is transported as XML content. Therefore, local portlets that want to communicate with remote portlets must either declare event payloads with appropriate XML serialization definitions by using the Java XML Binding framework (JAXB) or process the raw XML strings.

If the remote portlet Producer is also a WebSphere Portal V6.1 portal or another JSR 286–compliant portal, and if local and remote portlets are using the same JAXB definitions, then the correct XML translations happens automatically.

Document libraries in virtual portal

A document library that is available in the initial portal installation may also be available in each virtual portal. This depends on personalization being available in that virtual portal and being configured appropriately concerning that document library.
Searching for a document in a document library will produce a document reference (URL) that is different in each virtual portal, but these discrete references point to the same document in the document library. To provide separation of content within virtual portals, use separate document libraries for each virtual portal. To provide content collaboration between virtual portals, use the same document libraries between virtual portals.

Steps for replacing default intial content of VP

If you want you can replace the initial content of the virtual portal that you create using Manage Virtual portal portlet. To replace the default XML script with your own custom XML script, proceed as follows:

  1. Place your custom XML script in the following directory:
    was_profile_root/installedApps/cellname/wps.ear/wps.war/virtualportal

  2. Open the Manage Portlets portlet by selecting Administration < Portlet Management< Portlets.

  3. In the list of portlets, locate the Virtual Portal Manager portlet.

  4. Click the Configure Portlet (wrench) icon of the Virtual Portal Manager portlet.

  5. Edit the SCRIPT_INIT_VP parameter of the portlet. Replace the value
    InitVirtualPortal.xml with the name of your custom XML script. You might need to
    note the parameter and remove it, and then re-enter the parameter with the name of
    your XML file.

  6. Click OK twice to save changes.

Customizing initial content of the virtual portal

Advanced master administrators can customize the default content for virtual portals as required, by modifying or replacing the XML script that specifies the initial content for virtual portals.

The following portal resources are mandatory content of a virtual portal and must be included in a customized XML initialization script for virtual portals:

  • Content root – wps.content.root

  • Login – wps.Login

  • Administration – ibm.portal.Administration

Sequence of process that executes when you create a new virtual portal

With the information that the administrator enters in Manage Virtual portal when creating the new virtual portal, the portlet triggers a sequence of processes to actually establish the new virtual portal. These processes include the following:


  • Creating a new root content node for the virtual portal.

  • Creating the new URL mapping to point to the new root content node.

  • Assigning the selected theme to the new root content node.

  • Granting the specified administrator group the action set for the Administrator role on the new root content node, and thereby, on the new virtual portal.

  • Calling the XML configuration interface script to create the initial content tree. This includes virtual portal–specific instances of the following portal resources: Favorites,Administration, Home, Manage Portlets, and Page Customizer with the corresponding concrete portlets. To change the content globally and before creating a virtual portal, modify the XML script that specifies the initial content for virtual portals.

  • Assigning default roles and access rights to subadministrators and users on the created resources.

Limitation for creating realm from multiple sources

You can create a realm to include multiple data sources such as more than one LDAP server or combination of LDAP and database server. Before combining multiple user registries, review the registries for limitations and correct any issues.


  • Distinguished names are unique among all registries in a realm. For example, if
    uid=wpsadmin,o=yourco exists in LDAP1, it must not exist in LDAP2, LDAP3, or DB1

  • Short names are unique among all registries in a realm. For example, if wpsadmin is
    used in LDAP1, it must not be used in LDAP2, LDAP3, or DB1.

  • Base distinguished names for registries in a realm do not overlap. For example, if LDAP1 is c=us,o=yourco, LDAP2 must not be o=yourco.

  • Base entries are not blank for any registries in a realm.

  • Users exist in the user registry, not in the property extension configuration.

Steps for enabling security in clustered environment

The enable security steps should be performed after the horizontal/vertical cluster is setup. You can also keep using File repository in clustered environment, in that case you create a new user on DM machine and push the fileRepository.xml to nodes.


  • Change the wp_security_ids.properties file on the primary portal node to match the LDAP configuration

  • Validate the values that you entered by executing ./ConfigEngine.sh validate-standalone-ldap comand

  • Once the validation is completed successfully you can modify the security by executing ./ConfigEngine.sh wp-modify-ldap-security command

  • Restar the DMGR, all NodeAgents and all cluster members

  • Copy the wp_security_ids.properties file to the secondar cluster node. Copy the settings from the helper file to wkplc.properties file by executing ConfigEngine.bat -DparentProperties=/ConfigEngine/config/helpers/wp_security_ids.p
    roperties -DsaveParentProperties=true


  • Update the portal security information on the secondary node by executing the following command ConfigEngine.bat wp-change-portal-admin-user -DnewAdminId=wpsadmin -DnewAdminPwd=wpsadmin -DnewAdminGroupId=wpsadmins

  • Restart the secondary portal node

Steps for setting up vertical cluster

Install and configure Deployment Manager


  • Install the DMGR

  • Start DMGR

  • Change DMGR configuration to increase the timeout value of Web Container and SOAP

  • Create portal admin user and group in the DMGR using WAS Admin Console

  • Restart the DMGR


Install and prepare Primary portal node


  • Install the portal server. While installing use the username and password that you created in the DMGR

  • Configure the primary portal node to an external database


Federate and cluster Primary Node


  • Collect files from the portal node that will need to be added to the DM by executing ConfigEngine.bat collect-files-for-dmgr

  • Copy the resultant file to the DMGR, expand its content and copy them to appropriate places

  • Add the node to the deployment manager cell by executing ConfigEngine.sh cluster-node-config-pre-federation task


  • Update the Deployment manager configuration for the new WebSphere POrtal server by executing the ConfigEngine.sh cluster-node-config-post-federation task

  • Create the cluster definition and add the cluster member by executing the cluster-node-config-cluster-setup


Adding additional horizontal cluster members


  • Install the Portal Server on secondary node. While installing use the username and password that you created in the DMGR

  • Copy database configuration from primary portal node. Copy wkplc_comp.properties and wkplc_dbtype.properties file as it is but modify the wkplc.properties file manually.

  • Add this node to deployment manager by executing ./ConfigEngine.sh cluster-node-config-pre-federation task

  • Update the deployment manager configuration for the newly added cluster member by executing ./ConfigEngine.sh cluster-node-config-post-federation task

  • Add the newly federated WebSphere_Portal server as a cluster member to the existing cluster by execting cluster-node-config-cluster-setup task

Finding out the port for websphere portal

If your looking at a portal installed by someone else and want to find out the port no.s you can follow these steps

  • Go to the wp_profile/ConfigEngine and execute ./ConfigEngine.sh list-server-ports config task.

  • This task will create wp_PortMatrix.txt file in the wp_profile/ConfigEngine/log directory

  • In my case with default portal installation this is how the file looks like


    WC_defaulthost=10040
    WC_adminhost=10027
    WC_defaulthost_secure=10035
    WC_adminhost_secure=10041
    BOOTSTRAP_ADDRESS=10031
    SOAP_CONNECTOR_ADDRESS=10033


Once you know the port nos you can connect to portal by using http://localhost:<WC_defaulthost>/wps/portal and admin console by going to https://localhost:<WC_adminhost_secure>/ibm/console.

Error Handling in attribute based administration

If there is an error finding or executing a rule assigned to a page or portlet, by default that page or portlet will be hidden. This behavior can be overridden globally by changing the value in the rulesEngine.visibilityDefault property, which is located in wp_profile_root/PortalServer/config/config/services/PersonalizationService.properties. Set the value of this property to show portlets or pages if an error occurs. This is particularly useful in development environments.
The property rulesEngine.throwObjectNotFoundException, also located in wp_profile_root/PortalServer/config/config/services/PersonalizationService.properties, specifies what happens if an object such as a user is not found when needed during rule execution. This may occur when Personalization cannot find the current user or when an expected application object does not exist on the session or request at the expected key. When set to false, a null user or object is not treated as an error but is instead only printed to the logs as a warning. Personalization will continue as if the requested attribute of the null object is itself null. For example, if no user object is found and rulesEngine.throwObjectNotFoundException is set to false, a rule such as Show page or portlet when user.name is null would return show. A null user is treated as if the user name is null. However, if no user object was found and rulesEngine.throwObjectNotFoundException is set to true, this same rule would throw
an exception. If this rule was used to determine the visibility of a page or portlet, the ultimate result would depend upon the value of the rulesEngine.visibilityDefault property, which would decide what occurs if an exception is thrown during processing of a rule in attributebased administration.

JVM Signal

The Thread dump has information about what caused the thread dump. It could be either user initiated or because server hanged. The java core file has title section that has information on what caused the server hang. One of the information filed is JVM Signal that specifies the JVM signal. Take a look at this table that defines what are the basic categories of the signal and meaning of each one of them.

Puma Service tuning

The options configured under the PUMA Service affect the performance characteristics of the internal PUMA layer, the function of which is to build a member object associated with a user’s specific attributes. This is achieved in part by submitting a request to another internal Portal component called WWM. For efficiency, PUMA was designed to initially request a minimum subset of attributes from WMM, which would in most circumstances fulfill most member object requests.

The user.base.attributes property is a comma separated list of attributes that will be requested initially from WMM by PUMA when a user first logs in. The user.minimum.attributes property is a comma-separated list of attributes that will be requested initially from WMM by PUMA. If Portal or a Portlet requests an attribute that is not defined in the list, PUMA is then forced to make a subsequent request for the entire attribute subset. This is somewhat costly in terms of performance, as additional queries to the user data store will result.

You should ensure that both the user.minimum.attributes and group.minimum.attributes
settings contain the attributes deemed necessary for your requirements. If Portal (or a Portlet) requests an attribute that is not present in any of the above lists, PUMA will make a second request to the user registry. However, such a request will actually be for a full attribute set retrieval, from the user registry through WMM.

Navigation service configuration

Several attributes found under the Navigator Service can be modified to influence the
performance behavior of the Portal anonymous front page. By increasing the public.reload setting, less of an impact will be made on the Portal database, as the database will be queried less frequently to reload the page details. The default value of 60 seconds has the potential to overwhelm the database and can increase without hesitation.
If the Portal anonymous front pages are not likely to change regularly, then the public.expires setting can also be increased. The expiration value can be used by Portal to define the HTTP expires header lifetime for anonymous front pages, in accordance with section 14.9.3 of RFC 2612 The CAST-256 Encryption Algorithm. The expiration value is, however, only applicable for cached responses and not for first-time requests. It effectively sets the duration after which the cached response is considered stale in a user’s browser.

Location of the java core file

You can generate Thread Dump (Snapshot of what different threads were doing at that point of time) explicitly by executing "kill -3 pid" command or if server crashed for some reason it will also generate the Java core

You can look for the location for javacore within the file native_stderr.log.

look at the following locations for java core file:

  • The location specified by the IBM_JAVACOREDIR environment variable if it is set.

  • <WSAS_install_root> (for WebSphere Application Server V5.1)
    or <WSAS_install_root>/profiles/<profile> (for WebSphere Application Server V6.0)

  • The location that is specified by the TMPDIR environment variable, if set.

  • The /tmp directory or on Microsoft Windows the location that is specified by the by the TEMP environment variable, if configured.

Monitoring Database during the performance testing

You should monitor your database server very carefully when your executing the load test on the portal server. You can monitor couple of things a) The database server itself to check CPU, Memory of db server,...

On the portal side you can monitor how the connection to data base and the performance of the queries are doing by following these steps

  1. Login into the WebSphere Application Server Admin Console and go to Monitor and Tuning -> Performance Viewer -> Current Activity

  2. Enable the monitoring of the data source that you want. The release database is used queried a lot in portal because it has the data related portal layout, access control, ..etc. Enable the monitoring on release data source


  3. After enabling the release data source monitoring click on View Modules button, it will display information about release data source like this.


    The TPV will display details related to release data source. In these details three fields are very important

    • Time spent executing database calls(JDBCTime): This is the time required for issuing database queries. This value should normally be <35ms.

    • Connection pool average wait time(WaitTime): This should be very close to 0. Otherwise, it means that the database pool is likely too small, causing many connections to wait

    • Connection pool Prepared statement cache discards(PrepStmtCacheDiscardCount): Prepared JDBC query statements are stored in JVM memory, reducing CPU load on the debase server. Calculate the ratio for each data source (wpsdb, jrcdb, wmmdb, and so forth): Discard ratio = # of discards / total # of queries If you see a data source with a very high ratio, you should increase the size of the prepared statement cache associated with that data source. Since wpsdb is the most critical to overall portal performance, make sure its discard ratio is low (<10%). If your portal implementation makes heavy usage of WCM or Personalization, pay special attention to the JCR data source. If your users are stored in the database, instead of LDAP, or if you have a lot of user data stored in the LookAside database, pay extra attention to the WMM data source